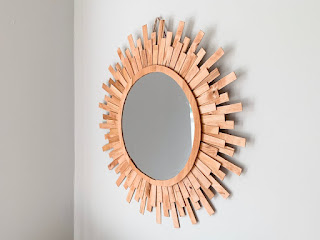
Creative Cool Woodworking Projects for Personalized Designs

Unleash Your Inner Artisan: Creative Woodworking Projects with Personalized Flair

Woodworking offers a unique blend of artistry and craftsmanship, allowing you to create personalized pieces that reflect your individual style and add a touch of warmth to any space. Forget mass-produced furniture; this article delves into exciting projects that empower you to design and build truly one-of-a-kind creations. Prepare to be inspired and discover the joy of transforming raw wood into breathtaking personalized masterpieces!

Personalized Cutting Boards: A Culinary Canvas

Elevate your kitchen with a custom cutting board that's as unique as your culinary adventures. Instead of a generic, store-bought board, imagine a handcrafted masterpiece featuring your family's initials intricately carved into the wood's surface, or perhaps a bespoke design inspired by your favorite nature scene. This project allows for endless customization. You can choose from various hardwoods, each offering a unique grain and texture, adding to the board's visual appeal and durability. Consider incorporating contrasting wood species for inlay work, creating stunning visual patterns.

Design Considerations for Your Cutting Board:

  • Choose durable hardwoods like maple, cherry, or walnut for optimal performance.
  • Sketch your design beforehand, ensuring it's proportionate to the board's dimensions.
  • Use appropriate tools for carving, ensuring safety and precision.
  • Finish the board with food-safe oil to protect the wood and enhance its natural beauty.

Engraved Wooden Signs: Tell Your Story

Capture cherished memories or inspiring quotes with custom-engraved wooden signs. These aren't your typical, mass-produced signs; they're personal narratives etched into beautiful, handcrafted wood. Imagine a rustic welcome sign for your front porch, showcasing your family name in elegant calligraphy. Or perhaps a motivational quote adorning your home office, serving as a daily reminder of your goals. The possibilities are as vast as your imagination. You can experiment with different fonts, wood types, and finishes to create a sign that perfectly reflects your personality and style.

Personalizing Your Wooden Sign:

  • Select a wood type that complements your desired aesthetic (rustic pine, sleek walnut, etc.).
  • Design your engraving using software or hand-drawn sketches; consider incorporating relevant symbols or imagery.
  • Use a router or laser engraver for precise, professional results.
  • Apply a protective sealant to safeguard the engraving and enhance the wood's longevity.

Custom-Built Bookshelves: A Literary Haven

Transform your reading nook into a personalized haven with custom-built bookshelves tailored to your specific needs and style. Don't settle for generic shelving units; create a masterpiece that blends seamlessly with your décor. Incorporate unique design elements such as curved shelves, hidden compartments, or integrated lighting. The ability to customize the dimensions, shelving configuration, and overall aesthetic allows you to perfectly optimize the space, ensuring that your beloved books are displayed in a stylish and functional manner. Consider adding personalized touches like engraved bookends or a custom-carved header.

Building Your Dream Bookshelves:

  • Carefully measure your space to determine the optimal size and configuration.
  • Select high-quality lumber and appropriate joinery techniques for durability.
  • Plan your design meticulously, including details like shelf spacing and overall aesthetic.
  • Finish the shelves with a stain or paint that complements your room's décor.

These are just a few ideas to spark your creativity. Remember, the key to truly personalized woodworking is to embrace your individual style and let your imagination run wild. So grab your tools, gather your materials, and embark on a journey of creative self-expression through the art of woodworking!

Share:

Mirror Woodworking Plans for Unique Home Decor

Mirror Woodworking Plans for Unique Home Decor

Hey there, fellow DIY enthusiasts! So you're looking to add some seriously stylish and unique flair to your home, and you've landed on the idea of incorporating mirrors with woodworking. That's awesome! Mirrors aren't just functional; they're fantastic decorative elements, and when you combine them with the warmth and character of wood, you're talking about a home decor upgrade that's truly special. This isn't your grandma's plain old mirror – we're going to explore some seriously cool woodworking projects that will make your home shine (literally!).

Getting Started: Tools and Materials

Before we dive into specific projects, let's talk about the essentials you'll need. Don't worry, you don't need a fully equipped workshop to pull this off! Most of these projects are achievable with common tools and materials, but having the right stuff will make the process smoother and safer.

Essential Tools:

  • Measuring Tape: Accuracy is key, especially when working with mirrors.
  • Pencil: For marking your cuts and designs.
  • Saw (Handsaw, Jigsaw, or Circular Saw): Choose the saw that best suits your skill level and the project's complexity.
  • Wood Glue: A strong wood glue is essential for secure joints.
  • Clamps: To hold pieces together while the glue dries.
  • Sandpaper (Various grits): For smoothing surfaces and achieving a professional finish.
  • Screwdriver (or Drill): Depending on the design, you may need screws.
  • Safety Glasses and Dust Mask: Always prioritize safety!

Essential Materials:

  • Wood (various types): Consider using hardwoods like oak, maple, or walnut for durability and a beautiful finish. Softwoods like pine are also suitable for some projects.
  • Mirrors: You can find mirrors at most home improvement stores. Make sure to accurately measure your frame before purchasing.
  • Wood Finish (Stain, Paint, or Varnish): Choose a finish that complements your home's style and the type of wood you're using.
  • Fasteners (Screws or Nails): If necessary for your design.

Mirror Woodworking Project Ideas

Now for the fun part – let's brainstorm some amazing mirror projects!

1. The Classic Framed Mirror:

This is a great starting point for beginners. Choose a wood type, cut the pieces to the desired size (remember to account for the mirror's dimensions!), and assemble the frame using wood glue and screws or nails. Sand it smooth, apply your chosen finish, and voila! A beautiful, classic framed mirror.

2. The Geometric Mirror:

Get creative with shapes! Instead of a simple rectangle or square, construct a frame with interesting geometric patterns. Think triangles, hexagons, or even more complex designs. This project requires a bit more precision in cutting, but the final result is stunning.

3. The Rustic Mirror:

Embrace a more natural, rustic look by using reclaimed wood or leaving some of the wood's natural imperfections visible. A distressed finish or a natural wood stain will enhance the rustic charm. This style perfectly complements farmhouse or bohemian decor.

4. The Modern Minimalist Mirror:

For a sleek, contemporary feel, opt for a simple, clean frame made from a single type of wood. A minimalist frame allows the mirror itself to be the focal point, making it perfect for a modern or mid-century modern aesthetic. Consider using a dark stain or a clean, white finish.

5. The Ornate Mirror:

If you're feeling ambitious, you can create a highly detailed and ornate frame. This could involve intricate carvings, moldings, or even the incorporation of other materials like metal or glass. This is a challenging project but the reward is a truly unique and stunning piece.

Tips for Success

Here are a few tips to make your mirror woodworking project a success:

  • Measure twice, cut once: This age-old adage is especially important when working with mirrors. Inaccurate cuts can ruin your project.
  • Use the right tools: Investing in quality tools will make the job easier and safer.
  • Take your time: Don't rush the process. Careful and precise work will result in a better-looking, more durable final product.
  • Practice your cuts: If you're using a new tool or technique, practice on scrap wood first.
  • Sand thoroughly: Smooth surfaces are crucial for a professional-looking finish.
  • Protect your work surface: Use a drop cloth or other protective covering to avoid damaging your work area.
  • Have fun!: Remember to enjoy the process! Woodworking is a rewarding hobby, and creating something beautiful for your home is even more satisfying.

Commonly Asked Questions

Here are some questions I often get about mirror woodworking projects:

Q: What type of wood is best for mirror frames?

A: Hardwoods like oak, maple, and walnut are excellent choices for their durability and beautiful grain. However, softer woods like pine can also work well, especially for simpler projects.

Q: How do I attach the mirror to the frame?

A: You can use strong adhesive specifically designed for mirrors, or you can use small mirror clips that are hidden behind the frame. Ensure the adhesive or clips are rated for the weight of your mirror.

Q: What kind of finish should I use?

A: The best finish depends on your desired look. Stain enhances the wood grain, paint provides a solid color, and varnish protects the wood and provides a glossy or satin sheen.

Q: Can I use reclaimed wood for my mirror frame?

A: Absolutely! Reclaimed wood adds character and a unique touch to your project. Just make sure the wood is clean, dry, and stable before you start working with it.

Q: Where can I find woodworking plans?

A: You can find numerous woodworking plans online, through woodworking magazines, or even at your local library. There are also many videos on platforms like Youtube that can help you visually learn techniques.

I hope this guide inspires you to create your own stunning mirror woodworking project! Remember to always prioritize safety, take your time, and most importantly, have fun! Happy crafting!

Share:

Free Outdoor Furniture Plans for Stylish Garden and Patio Furniture

Free Outdoor Furniture Plans for Stylish Garden and Patio Furniture

Transform your outdoor space into a stylish haven without breaking the bank! This article unveils a treasure trove of free outdoor furniture plans, empowering you to craft stunning garden and patio pieces. From rustic charm to sleek modern designs, we'll guide you through the process of building your dream furniture, all while saving money and adding a personal touch to your landscape.

Unleash Your Inner Craftsperson: Why Build Your Own Outdoor Furniture?

Forget overpriced store-bought furniture! Building your own outdoor furniture offers a multitude of advantages. First and foremost, it allows for complete customization. Choose the exact dimensions, materials, and style that perfectly complements your existing décor. Imagine a custom-built patio set, perfectly sized for your space and crafted from your favorite sustainably sourced wood. Secondly, you'll significantly reduce costs. The materials typically cost a fraction of the price of pre-made furniture, giving you more bang for your buck. Finally, building your own furniture provides immense satisfaction. The pride of creating something beautiful and functional with your own two hands is unparalleled. It's a rewarding experience that connects you to your outdoor space on a deeper level.

Finding the Perfect Free Outdoor Furniture Plans

The internet is a goldmine of free outdoor furniture plans! Numerous websites and blogs dedicated to DIY projects offer detailed blueprints, tutorials, and even video guides. Remember to carefully examine the plan before starting your project. Look for plans that provide clear instructions, detailed diagrams, and a comprehensive materials list. Consider the complexity of the plan and your own skill level. Starting with a simpler project will build your confidence and allow you to hone your woodworking skills. Don't be afraid to modify plans to fit your specific needs and preferences. Perhaps you'd prefer a slightly larger table or a different type of wood. The beauty of DIY is in the personalization!

Where to Find Reliable Plans:

  • DIY Network and Popular Home Improvement Blogs: Many reputable websites offer free downloadable plans, often with accompanying articles and video tutorials.
  • Pinterest: Search for "free outdoor furniture plans" to unearth a wealth of inspirational projects and links to detailed plans.
  • YouTube: Watch detailed video tutorials that walk you through each step of the building process, providing visual guidance for even the most intricate designs.
  • Local Libraries and Community Centers: Some libraries and community centers offer woodworking classes and may have access to free plans or resources.

Essential Materials and Tools

Before diving into your project, gather all the necessary materials and tools. This crucial step prevents costly delays and ensures a smooth building process. The materials list will vary depending on the chosen plan, but common items include various types of wood (pressure-treated lumber is ideal for outdoor use), screws, nails, wood glue, stain or paint, and protective sealant. Essential tools may include a saw (circular saw or miter saw), drill, sander, measuring tape, level, and safety glasses. Invest in high-quality tools if you plan on undertaking multiple projects; they will make the process much easier and safer.

From Blueprint to Backyard Oasis: Building Your Dream Furniture

With your plans and materials ready, it's time to bring your vision to life! Follow the instructions meticulously, taking your time and focusing on accuracy. Don't rush the process; precision is crucial for creating a sturdy and aesthetically pleasing piece of furniture. Remember to take regular breaks and celebrate your progress. Building outdoor furniture is a journey, not a race. Once your furniture is assembled, apply a protective sealant to extend its lifespan and enhance its beauty. Enjoy the fruits of your labor, relax in your newly created outdoor oasis, and admire the stunning furniture you built yourself!

Share:

Craft Comfortable Chairs with These Woodworking Plans

Craft Comfortable Chairs with These Woodworking Plans

Hey there, fellow woodworking enthusiasts! Are you itching to build something truly satisfying, something you can sink into after a long day? Well, you've come to the right place! I'm going to walk you through crafting your very own comfortable chairs using these detailed woodworking plans. We'll cover everything from choosing the right wood to the finishing touches, ensuring you end up with a piece you'll be proud of (and comfy in!).

Choosing Your Wood: The Foundation of Comfort

The wood you choose is crucial, not just for the aesthetics but also for the chair's overall comfort and durability. Hardwoods are generally preferred for chairs because they're strong and resist wear and tear. But that doesn't mean softwoods are completely out of the question. It all depends on your design and intended use.

Hardwoods for Strength and Elegance

Think about these options:

  • Oak: A classic choice, oak is incredibly strong, durable, and boasts a beautiful grain. It's a bit more expensive but worth it for a chair you'll use every day.
  • Maple: Known for its smooth, fine grain and light color, maple is a great option if you want a lighter, more contemporary look. It's also very strong and holds up well.
  • Cherry: If you're after a rich, warm tone, cherry is a beautiful choice. It ages gracefully, developing a deeper color over time. Keep in mind it's a bit softer than oak or maple.
  • Walnut: A luxurious hardwood with stunning dark grain, walnut adds a touch of elegance to any room. It's strong but can be more challenging to work with than some other options.

Softwoods for Lighter Projects

While generally less durable than hardwoods, softwoods can be suitable for certain chair designs, particularly those that aren't subjected to heavy use. Consider these:

  • Pine: A readily available and affordable option, pine is relatively easy to work with. However, it's softer and more prone to dents and scratches, so it's best for less demanding chairs.
  • Fir: Similar to pine in terms of workability and durability, fir is a good alternative if you want a slightly denser softwood.

Remember to consider the climate where the chair will be placed. Some woods are more resistant to moisture than others, which is important if you live in a humid environment.

Essential Tools for the Job

Before you start, make sure you have the right tools. This isn't just about speed; it's about safety and achieving a high-quality finish.

Power Tools for Efficiency

  • Circular Saw or Miter Saw: For accurate cuts.
  • Jigsaw: For intricate curves and shaping.
  • Drill: Essential for pilot holes and assembling the chair.
  • Router: Optional, but helpful for creating decorative edges or shaping components.
  • Random Orbital Sander: For smoothing surfaces and preparing for finishing.

Hand Tools for Precision

  • Chisels: For cleaning up joints and shaping.
  • Clamps: To hold pieces securely during assembly.
  • Measuring Tape and Square: Accuracy is key!
  • Screwdrivers (various sizes): For fastening hardware.
  • Safety Glasses and Dust Mask: Always prioritize safety!

Step-by-Step Chair Construction

Now for the fun part! The exact steps will depend on the specific chair design you've chosen. However, here's a general overview of the process:

Cutting the Wood

Carefully cut all the pieces according to your chosen plans. Double-check your measurements to avoid costly mistakes! Accurate cutting is fundamental to a well-built chair.

Joinery Techniques

This is where the skill comes in. Common joinery techniques for chairs include:

  • Mortise and Tenon: A strong and traditional joint.
  • Dowel Joints: Simpler to execute but still provides good strength.
  • Pocket Hole Joinery: A modern method that's quick and effective.

Choose the joinery method that best suits your skills and the chair's design. Properly executed joinery is what holds your chair together!

Assembly

Once all your pieces are cut and the joints are prepared, carefully assemble the chair. Use clamps to hold everything securely in place while the glue dries. Take your time and ensure everything aligns perfectly.

Finishing Touches

After assembly, sand the chair thoroughly to achieve a smooth surface. Then, apply your chosen finish. This could be stain, paint, varnish, or a combination thereof. Multiple coats are usually necessary for optimal protection and a beautiful finish.

Adding Comfort: Cushions and Upholstery

While a well-made wooden chair can be comfortable on its own, adding cushions and upholstery takes comfort to the next level. Consider the fabric's durability and ease of cleaning. High-density foam provides superior support and comfort.

Commonly Asked Questions

Q: What's the best type of wood glue to use?

A: A high-quality wood glue, such as Titebond III, is recommended for its strength and water resistance.

Q: How long does it take to build a chair?

A: This depends entirely on the chair's complexity and your experience level. A simple chair could take a weekend, while a more intricate design might require several weeks.

Q: Can I modify these plans to create a different chair style?

A: Absolutely! These plans provide a starting point. Feel free to adapt and modify them to create your own unique design.

Q: What's the best way to finish the chair?

A: This is a matter of personal preference. Oil-based finishes offer excellent durability, while water-based finishes are less toxic. Experiment to find what you like best.

Q: Where can I find more detailed woodworking plans?

A: Numerous online resources, woodworking books, and magazines offer detailed chair plans. Consider your skill level when choosing plans.

Happy woodworking! Remember to take your time, enjoy the process, and most importantly, have fun creating your comfortable, handcrafted chair. I can't wait to see the results!
Share:

Design Safe and Creative Baby Furniture with These Plans

Designing Safe & Creative Baby Furniture: Beyond the Basics!

Okay, parents-to-be and seasoned parents, let's talk baby furniture! We all know the basics: crib, changing table, dresser. But wouldn't it be amazing to create a nursery that's not only safe but also reflects your unique style and personality? This isn't about sacrificing safety for aesthetics; it's about finding that perfect balance. Let's dive into some creative ideas, keeping safety firmly at the forefront, of course!

The Crib: Safety First, Style Second (But Not Too Far Second!)

The crib is the cornerstone of any nursery. Safety standards are paramount here. We're talking about a little human spending a significant amount of time in there, so let's not mess around.

Choosing the Right Crib

First things first: always buy a crib that meets current safety standards. Look for certifications from organizations like the Juvenile Products Manufacturers Association (JPMA). Check for things like:

  • Proper slat spacing (to prevent your little one from getting their head stuck).
  • Stable construction (no wobbly bits!).
  • Non-toxic finishes (no lead or other harmful chemicals).
  • A firm mattress (no gaps between the mattress and the crib sides).

Beyond the safety aspects, let's get creative! Instead of a plain white crib, consider:

  • A unique wood type: Think reclaimed wood for a rustic feel, or a beautiful, naturally finished cherry or maple for a more classic look.
  • Adding a canopy: A lightweight, breathable canopy can add a touch of whimsy and elegance (make sure it's securely attached and never obstructs airflow).
  • Custom bedding: Don't be afraid to get creative with the crib sheets and blankets. Find fabrics and patterns that truly reflect your style.
  • DIY mobile: Instead of buying a pre-made mobile, create your own using soft, lightweight materials. Think felt shapes, knitted animals, or even family photos (always securely fastened, of course!).

The Changing Table: Functionality Meets Fashion

Changing tables are essential, but they can easily become a boring, functional piece of furniture. Let's spice things up!

Safety Considerations for Changing Tables

A changing table, like a crib, needs to be rock-solid. Never leave your baby unattended on a changing table. Ensure it's sturdy, has a wide, stable base, and consider using a changing pad with safety straps. Also, make sure it's securely attached to the wall if it's not a freestanding unit.

Creative Changing Table Ideas

Here's where we can inject some personality:

  • Built-in storage: Design a changing table with drawers or shelves for diapers, wipes, and other essentials. This keeps everything organized and within easy reach.
  • Unique materials: Consider using a different material for the changing table itself – perhaps a painted dresser, a repurposed antique, or even a custom-built piece using reclaimed wood.
  • Matching décor: Coordinate the changing table with the overall nursery theme. This creates a cohesive and stylish space.
  • Artful additions: Add artwork, a mirror (safely positioned!), or a small decorative shelf to personalize the changing table area.

Dressers and Storage: Beyond the Ordinary

Storage is crucial when it comes to baby gear. But who says storage has to be boring?

Safety First with Dressers

The same safety rules apply to dressers as they do to changing tables: stability is key. Always anchor your dresser to the wall using anti-tip straps to prevent it from tipping over. Avoid dressers with sharp corners or edges.

Creative Storage Solutions

Let's elevate your storage game:

  • Repurposed furniture: Give an old dresser a fresh coat of paint and new hardware. You can even add decorative molding for a more sophisticated look.
  • Open shelving: Combine open shelving with closed storage for a balance of visual appeal and practicality.
  • Built-in baskets and bins: Use baskets and bins to organize items within drawers and on shelves. This keeps things tidy and adds a touch of texture.
  • Theme-based storage: Choose storage solutions that complement the nursery's theme. For example, if your theme is woodland creatures, use baskets with animal motifs.

Beyond the Basics: Rocking Chairs, Bookshelves, and More!

Let's explore some other furniture pieces that can elevate your nursery's style and functionality.

Rocking Chairs: Comfort and Style

A comfortable rocking chair is a must-have for late-night feedings and soothing your little one. Consider choosing a chair made from high-quality materials that will stand the test of time. Add a soft throw blanket and a floor lamp for a cozy reading nook.

Bookshelves: Growing with Your Child

Start a love of reading early! Choose a bookshelf that's not only functional but also visually appealing. You can paint it a fun color, add decorative elements, or even create a custom bookshelf to match the nursery's theme.

Commonly Asked Questions

Here are some frequently asked questions regarding baby furniture safety and design:

  • Q: What is the best type of wood for baby furniture? A: Hardwoods like maple, cherry, and oak are durable and less prone to scratches and dents. Ensure any wood is finished with non-toxic paints or stains.
  • Q: How can I make sure my furniture is safe for my baby? A: Always check for certifications (JPMA is a good one), inspect for loose parts, sharp edges, or any potential hazards. Anchor tall furniture to the wall using anti-tip straps.
  • Q: What are some budget-friendly ways to create a stylish nursery? A: Repurpose existing furniture, shop for secondhand items, DIY projects (like painting furniture or creating a custom mobile), and look for sales and discounts.
  • Q: How can I incorporate my personal style into the nursery design? A: Choose colors, patterns, and fabrics that reflect your preferences. Add artwork, textiles, and decorative items that you love. Don't be afraid to mix and match styles!
  • Q: Are there any must-have safety features for baby furniture? A: For cribs, check slat spacing and mattress firmness. For dressers and changing tables, ensure they are securely anchored to the wall and are stable. Always prioritize safety over aesthetics!

Remember, creating a safe and stylish nursery is all about finding that perfect balance. Prioritize safety, but don't be afraid to unleash your creativity and design a space that you and your little one will cherish for years to come!

Share:

DIY country garden bench plans for outdoor relaxation

Constructing a Rustic Country Garden Bench: A Comprehensive Guide

This detailed guide provides comprehensive instructions for crafting a charming and durable country garden bench, perfect for outdoor relaxation and enhancing the aesthetic appeal of your garden. The project emphasizes the use of readily available materials and straightforward construction techniques, making it suitable for both experienced and novice DIY enthusiasts. Careful attention to detail and adherence to safety protocols are paramount throughout the construction process.

Phase 1: Planning and Material Acquisition

Before commencing construction, meticulous planning is crucial for ensuring a successful outcome. This phase involves determining the bench's dimensions, selecting appropriate materials, and gathering necessary tools. Careful consideration of the garden's style and the intended location of the bench will inform the design choices.

Determining Dimensions and Design

The desired dimensions of the bench should be determined based on the available space and the number of occupants it will accommodate. A typical bench may measure approximately 48 inches in length, 18 inches in depth, and 18 inches in height. However, these dimensions can be adjusted to suit individual preferences and space constraints. Consider incorporating design elements such as armrests, a backrest, or decorative embellishments to complement the overall aesthetic of the garden.

Material Selection

The choice of materials significantly impacts the bench's durability, aesthetic appeal, and maintenance requirements. Pressure-treated lumber is an excellent option for outdoor use due to its resistance to rot and insect infestation. Alternatively, cedar or redwood offer natural durability and a pleasing aesthetic. Ensure that the selected lumber is free from knots, cracks, or other imperfections that could compromise the structural integrity of the bench.

For the bench's hardware, galvanized or stainless steel screws and bolts are recommended for their resistance to corrosion. Exterior-grade wood glue will enhance the strength and stability of the joints. Consider using a protective sealant or stain to further enhance the bench's longevity and enhance its visual appeal.

Tool Acquisition and Preparation

Before commencing construction, assemble all necessary tools to streamline the process and ensure safety. The following tools are essential:

  • Measuring tape
  • Saw (circular saw or hand saw)
  • Drill with assorted drill bits
  • Screwdriver (or drill with screwdriver bit)
  • Level
  • Clamps
  • Safety glasses
  • Work gloves
  • Wood glue
  • Sandpaper (various grits)
  • Exterior wood sealant or stain (optional)

Phase 2: Construction of the Bench Frame

The construction of the bench frame is a critical step, requiring precision and attention to detail to ensure stability and durability. This phase involves cutting the lumber to the predetermined dimensions and assembling the frame using appropriate joining techniques.

Cutting the Lumber

Accurately cut the lumber according to the pre-determined dimensions. Use a saw guide for straight cuts and ensure the cuts are square to prevent instability. For the seat supports, cut four pieces to the desired length. For the legs, cut four pieces to the desired height. For the seat supports, ensure you cut pieces for the backrest supports as well depending on design. Remember to account for the thickness of the seat boards when determining the height of the legs.

Assembling the Frame

Assemble the frame by attaching the legs to the seat supports. Use wood glue and galvanized screws to secure the joints. Ensure the frame is square and level using a level and clamps. For added strength, consider using reinforcing brackets at the joints. Once the frame is assembled, allow the glue to dry completely before proceeding to the next phase.

Phase 3: Attaching the Seat and Backrest (if applicable)

Once the frame is securely assembled, the next phase involves attaching the seat and backrest boards. Ensure the boards are evenly spaced and securely fastened to the frame for both comfort and stability.

Preparing the Seat Boards

Cut the seat boards to the desired length and width, ensuring they are slightly longer than the distance between the seat supports to allow for slight overhang. Sand the edges of the seat boards to remove any splinters and ensure a smooth finish. Pre-drill pilot holes before screwing the boards to the frame to prevent splitting the wood.

Attaching the Seat and Backrest Boards

Securely attach the seat boards to the frame using screws and wood glue. Ensure the boards are evenly spaced and aligned. For the backrest, if included in the design, follow a similar process, ensuring that the angle of the backrest is comfortable and provides adequate support.

Finishing Touches

Once the seat and backrest are securely attached, lightly sand the entire bench to remove any rough edges or splinters. Apply a wood sealant or stain to protect the wood from the elements and enhance its aesthetic appeal. Allow the sealant or stain to dry completely before placing the bench in its intended location.

Phase 4: Placement and Maintenance

Careful consideration of placement and regular maintenance are crucial for preserving the bench's longevity and aesthetic appeal. Choose a location that is both aesthetically pleasing and practical, ensuring adequate drainage and protection from harsh weather conditions.

Choosing the Ideal Location

Select a level surface for placement to ensure stability and prevent the bench from tilting. Consider the bench's proximity to other garden features, such as flower beds or pathways. Avoid placing the bench in areas prone to water accumulation or direct exposure to harsh sunlight for extended periods. Proper drainage is crucial to prevent rot and premature deterioration.

Ongoing Maintenance

Regular maintenance will extend the life of your garden bench. Periodically inspect the bench for loose screws or damaged boards. Tighten any loose screws and replace any damaged components promptly. Apply a fresh coat of sealant or stain every few years to protect the wood from the elements. Regular cleaning will help to remove dirt and debris, preserving the bench's aesthetic appeal.

By carefully following these instructions and adhering to safety protocols, you can construct a beautiful and durable country garden bench that will provide years of enjoyment. Remember that safety should always be prioritized throughout the construction process. Wear appropriate safety gear, such as safety glasses and work gloves, and exercise caution when using power tools.

Share:

Step-by-step guide to contemporary woodworking projects

Unlocking the Craft: A Step-by-Step Guide to Contemporary Woodworking Projects

The allure of woodworking lies in transforming raw materials into beautiful, functional objects. Whether you're a seasoned craftsman or a curious beginner, the world of contemporary woodworking offers endless possibilities. This guide provides a structured approach, empowering you to tackle projects with confidence and creativity. We'll explore essential tools, techniques, and design considerations, transforming your woodworking aspirations into tangible reality.

Planning Your Project: From Inspiration to Blueprint

Before diving into the sawdust, meticulous planning lays the foundation for success. Start by identifying your project's purpose and desired aesthetic. Do you envision a sleek, minimalist shelf, a rustic farmhouse table, or perhaps a vibrant, geometrically patterned wall hanging? Consider the intended use â€" will it withstand daily wear and tear, or serve primarily as a decorative piece? This clarity guides material selection and design choices.

Sketching and Designing

Translate your vision into sketches. Don't worry about perfect precision at this stage; focus on capturing the overall form, proportions, and key features. Experiment with different angles and perspectives. This iterative process allows you to refine your design and address potential challenges before committing to the actual wood. Consider using digital design software for a more precise rendering and to generate cutting lists.

Choosing Your Materials

Material selection significantly impacts the project's final appearance and durability. Hardwoods like oak, maple, and walnut offer strength and a rich grain pattern, ideal for furniture and structural components. Softwoods such as pine and fir are easier to work with but may be less durable. Think about the project's function and your skill level when making your choice. Factor in the cost and availability of your chosen wood.

Essential Tools and Techniques: Equipping Your Workshop

Contemporary woodworking utilizes a blend of traditional and modern techniques. While a fully equipped workshop is ideal, you can start with a basic set of tools and gradually expand your collection as your skills develop. Safety should always be your top priority; always wear appropriate safety gear, including eye protection, dust masks, and hearing protection.

Essential Tools

Begin with the fundamentals: a measuring tape, hand saw, chisels, clamps, sandpaper, and a good quality hand plane. As your projects become more complex, consider investing in power tools like a circular saw, jigsaw, router, and a belt sander. Each tool offers specific functionalities, enhancing precision and efficiency.

Mastering Basic Techniques

Start with fundamental techniques like measuring, cutting, planing, and sanding. Practice these skills on scrap wood before tackling your main project. Learn different joinery methods, such as mortise and tenon, dovetail, and biscuit joints, to create strong and aesthetically pleasing connections. Online tutorials and woodworking books provide invaluable guidance.

Building Your Project: From Cut List to Finished Piece

With your design finalized and tools gathered, it’s time to bring your creation to life. Follow your blueprint meticulously, cutting the wood to the precise dimensions specified. Utilize clamps to secure pieces during assembly, ensuring accurate alignment and preventing movement. Take your time; patience and attention to detail are crucial for achieving a high-quality finish.

Assembly and Finishing

Assemble the components according to your plan, carefully checking for alignment and fit. Once assembled, sand the piece smooth, progressively using finer grits of sandpaper to achieve a flawless surface. Apply a finish to protect the wood and enhance its beauty. Options include oil-based finishes, water-based polyurethane, or even natural waxes, depending on the desired look and feel.

Embrace the Journey: Learning and Growing as a Woodworker

Woodworking is a continuous learning process. Embrace challenges, experiment with different techniques, and don't be afraid to make mistakes. Each project represents an opportunity to refine your skills and develop your unique style. Join online communities, attend workshops, and connect with other woodworkers to share knowledge and inspiration. Most importantly, enjoy the process of transforming wood into something beautiful and enduring.

Remember: Safety is paramount. Always prioritize safe practices and wear appropriate protective gear. With patience, persistence, and a passion for the craft, you'll soon be crafting stunning contemporary woodworking projects that you'll be proud to display.

Share:

Postingan Populer

Search This Blog

Powered by Blogger.

Entri yang Diunggulkan

Creative Cool Woodworking Projects for Personalized Designs

Unleash Your Inner Artisan: Creative Woodworking Projects with Personalized Flair Woodworking offers a unique blend of artistry and crafts...

Recent Posts

Pages

Theme Support