DIY Woodworking: The Best Dado Joints for Building Drawers

DIY Woodworking: The Best Dado Joints for Building Drawers

DIY Woodworking: The Best Dado Joints for Building Drawers

When it comes to constructing durable and aesthetically pleasing drawers, choosing the right joint is paramount. Among the various joinery techniques, dado joints stand out as a reliable and robust option. Their strength and stability, combined with their ease of construction, make them a popular choice for DIY woodworkers. This article delves into the world of dado joints, exploring their advantages, different types, and best practices for creating them.

Understanding Dado Joints

A dado joint is a recessed groove cut into a piece of wood that precisely fits a corresponding projection on another piece. It creates a strong and secure connection, similar to a mortise and tenon joint but with a wider, rectangular profile. The dado is typically cut across the grain of the wood, while the corresponding projection, called a "dado tongue," runs with the grain. This orientation enhances the joint's strength and stability.

Advantages of Dado Joints

Dado joints offer several advantages over other joinery methods:

  • Strength and Stability: The large surface area of the dado joint creates a strong, interlocking connection that distributes stress evenly, resulting in exceptional durability and resistance to racking and twisting.
  • Ease of Construction: Compared to other complex joints, dado joints are relatively straightforward to create, especially with the help of a dado stack or dado blade on a table saw.
  • Clean and Professional Look: The smooth, flush surfaces of a well-executed dado joint create a clean and professional appearance, enhancing the overall aesthetic appeal of your drawer construction.
  • Versatility: Dado joints are adaptable to various woodworking projects, including shelves, cabinets, and furniture frames, not just drawers.

Types of Dado Joints

There are different types of dado joints, each suited for specific applications and aesthetics:

Standard Dado Joint

The most common type, this dado joint is a simple, rectangular groove cut across the grain of the wood. It provides a solid, reliable connection and is easy to create.

Through Dado Joint

A through dado joint extends completely through the thickness of the wood, allowing for a more substantial connection. This type is particularly useful for applications where maximum strength is required, such as heavy-duty shelves or drawer boxes.

Blind Dado Joint

A blind dado joint only partially cuts through the wood, creating a hidden joint. This type is aesthetically appealing, as it avoids any visible grooves on the surface of the wood.

Double Dado Joint

This joint involves cutting two dados side-by-side, creating a channel for a double-thickness tongue. It offers increased strength and stability, making it suitable for heavier loads or demanding applications.

Tools and Techniques for Cutting Dado Joints

Cutting accurate and precise dado joints requires the right tools and techniques. Here are some essential tools and methods:

Table Saw with Dado Stack

A table saw equipped with a dado stack is the most common and versatile tool for cutting dado joints. A dado stack consists of two outer blades and one or more inner chipper blades, allowing you to create a wide range of dado widths. This setup provides precise cutting depth and a clean, smooth finish.

Dado Blade

A dado blade is a single, specialized blade designed for cutting dado joints. It features multiple teeth with a wider kerf than a standard saw blade. While not as versatile as a dado stack, it is a more affordable option for simple dado cuts.

Router with Dado Jig

A router, combined with a dado jig, can also be used to create dado joints. A dado jig is a template that guides the router, ensuring consistent and accurate cuts. This method is particularly suitable for cutting blind dado joints or complex dado shapes.

Hand-Cutting Dado Joints

While not as common, hand-cutting dado joints is possible using a chisel and a marking gauge. This method requires skill and patience, but it allows for exceptional accuracy and control.

Best Practices for Cutting Dado Joints

To ensure optimal results and create durable dado joints, follow these best practices:

  • Use Sharp Blades: Always ensure that your saw blades or router bits are sharp and in good condition for precise and clean cuts.
  • Proper Setup: When using a table saw or router, set up your tools correctly and adjust the depth of cut accurately to avoid cutting too deep or too shallow.
  • Measure Twice, Cut Once: Accurately measure and mark your wood before making any cuts. Double-check your measurements to ensure a perfect fit.
  • Support the Wood: When cutting dado joints, ensure that the wood is securely supported to prevent movement or vibration, which can lead to inaccurate cuts.
  • Use a Fence: A fence on your table saw or router will ensure straight and parallel dado cuts.
  • Clean Up: After cutting, remove any sawdust or chips to prevent them from interfering with the glue joint.

Tips for Building Drawers with Dado Joints

Here are some specific tips for building drawers using dado joints:

  • Choose the Right Wood: Select a stable wood species that won't warp or twist easily, such as maple, cherry, or oak.
  • Consider the Drawer Size: The size and weight of the drawer will determine the appropriate dado width and depth.
  • Create a Tight Fit: Ensure that the dado tongues fit snugly into the dados to create a strong connection.
  • Use Glue: Apply wood glue to the dado joint for a secure bond.
  • Clamping: Clamp the pieces together firmly while the glue dries.
  • Sand the Joints: After the glue has dried, sand the joints smooth for a professional finish.

Conclusion

Dado joints are a reliable and versatile joinery technique for building strong and aesthetically pleasing drawers. By understanding their advantages, different types, and best practices for cutting them, you can create high-quality drawers that will last for years to come. Whether you are a beginner or a seasoned woodworker, dado joints are a valuable tool to have in your arsenal.

Share:

Rustic Wood Toolbox Organizers for Workshop Storage

Rustic Wood Toolbox Organizers for Workshop Storage

Rustic Wood Toolbox Organizers for Workshop Storage

A well-organized workshop is a joy to work in. It allows for efficient workflow, easy access to tools, and a sense of order that fosters creativity. When it comes to tool storage, rustic wood toolbox organizers offer a unique blend of functionality and aesthetic appeal. They not only keep your tools organized but also add a touch of warmth and character to your workspace.

Rustic wood, with its natural imperfections and variations in grain, exudes a timeless charm that complements the utilitarian nature of a workshop. These organizers are crafted from durable hardwoods like pine, oak, or cedar, ensuring longevity and resistance to wear and tear.

Benefits of Rustic Wood Toolbox Organizers

Beyond their aesthetic appeal, rustic wood toolbox organizers offer several practical benefits:

Organization and Efficiency

The compartments and dividers within these organizers provide dedicated spaces for different tools, eliminating clutter and confusion. This promotes efficiency, as you can quickly locate the tool you need without wasting time searching.

Durability and Longevity

Made from sturdy hardwoods, these organizers are built to withstand the rigors of a workshop environment. They can handle heavy tools and resist scratches, dents, and wear, ensuring years of reliable service.

Versatility and Customization

Rustic wood toolbox organizers come in various sizes and configurations, allowing you to choose the perfect fit for your needs. Many can be customized with additional compartments, drawers, or even shelves, adapting to your specific tool collection and storage preferences.

Aesthetic Appeal

The natural beauty of rustic wood enhances the overall ambiance of your workshop. Its warm tones and unique grain patterns add a touch of character and make your workspace more inviting.

Types of Rustic Wood Toolbox Organizers

The world of rustic wood toolbox organizers is diverse, offering a range of options to suit various needs and preferences.

Traditional Toolboxes

These classic organizers are typically rectangular or square in shape, featuring a hinged lid and multiple compartments within. They are often constructed with a sturdy handle for easy portability.

Drawer Organizers

These organizers feature a series of drawers of different sizes, providing dedicated storage for various tools and accessories. They are particularly useful for storing smaller items like screws, nails, and drill bits.

Wall-Mounted Organizers

For maximizing space and creating a visually appealing storage solution, wall-mounted organizers are an excellent choice. They come in various designs, from simple shelves to intricate racks with hooks and compartments.

Rolling Organizers

For large tool collections or those who require mobility, rolling organizers are ideal. These typically feature multiple drawers, shelves, and compartments on a wheeled base, allowing easy transport around the workshop.

Choosing the Right Rustic Wood Toolbox Organizer

Selecting the perfect organizer requires considering several factors:

Tool Collection Size and Type

Assess the size and types of tools you need to store. A small toolbox may suffice for basic hand tools, while a larger organizer with multiple drawers and shelves is necessary for a more comprehensive collection.

Workspace Layout

Consider the available space in your workshop and the intended location of the organizer. Measure the area and choose a size and configuration that fits seamlessly.

Budget

Rustic wood toolbox organizers come in a range of price points, so set a budget before starting your search. Factor in the size, features, and quality of construction when making your decision.

Personal Preferences

Ultimately, your personal preferences should guide your choice. Choose a style and finish that complements your workshop decor and resonates with your aesthetic sense.

Maintenance and Care

Rustic wood toolbox organizers require minimal maintenance to preserve their beauty and functionality.

Cleaning

Dust regularly with a soft cloth. For deeper cleaning, use a mild wood cleaner and a damp cloth. Avoid using harsh chemicals or abrasive cleaners, as they can damage the wood finish.

Conditioning

Apply a wood conditioner periodically to protect the wood from drying out and prevent cracking. Choose a conditioner specifically designed for the type of wood used in your organizer.

Storage

Store the organizer in a dry environment to prevent moisture damage. Avoid exposing it to direct sunlight or extreme temperatures, as this can cause warping or discoloration.

Conclusion

Rustic wood toolbox organizers are a perfect blend of functionality and aesthetics, transforming your workshop into a more efficient and inviting space. They provide a dedicated home for your tools, promoting organization and ease of access, while adding a touch of rustic charm that enhances the overall ambiance. By carefully considering your needs, preferences, and the factors outlined above, you can choose the ideal organizer to elevate your workshop storage and streamline your workflow.

Share:

Top-Selling Cutting Board Designs for Woodworkers

Top-Selling Cutting Board Designs for Woodworkers

Top-Selling Cutting Board Designs for Woodworkers

Cutting boards are an essential kitchen item, and they are also a popular woodworking project. Woodworkers enjoy the challenge of crafting these functional and beautiful pieces, and they are a great way to showcase their skills. If you are a woodworker looking to create and sell cutting boards, it is important to understand the top-selling designs that customers are looking for.

This article will discuss the top-selling cutting board designs, including their features and benefits, as well as tips for creating them. By understanding the preferences of your customers, you can increase your sales and create cutting boards that are both beautiful and functional.

Classic Rectangular Cutting Board

The classic rectangular cutting board is a timeless design that is popular for a reason. It is simple, versatile, and easy to use.

Features and Benefits

  • Simple, timeless design
  • Versatile for a wide range of tasks
  • Easy to store and clean
  • Can be made in various sizes

Tips for Creating

  • Use a hardwood such as maple, cherry, or walnut for durability and moisture resistance
  • Ensure the board is properly sealed with food-safe oil or finish
  • Consider adding a juice groove to catch drips
  • Offer various sizes to meet customer needs

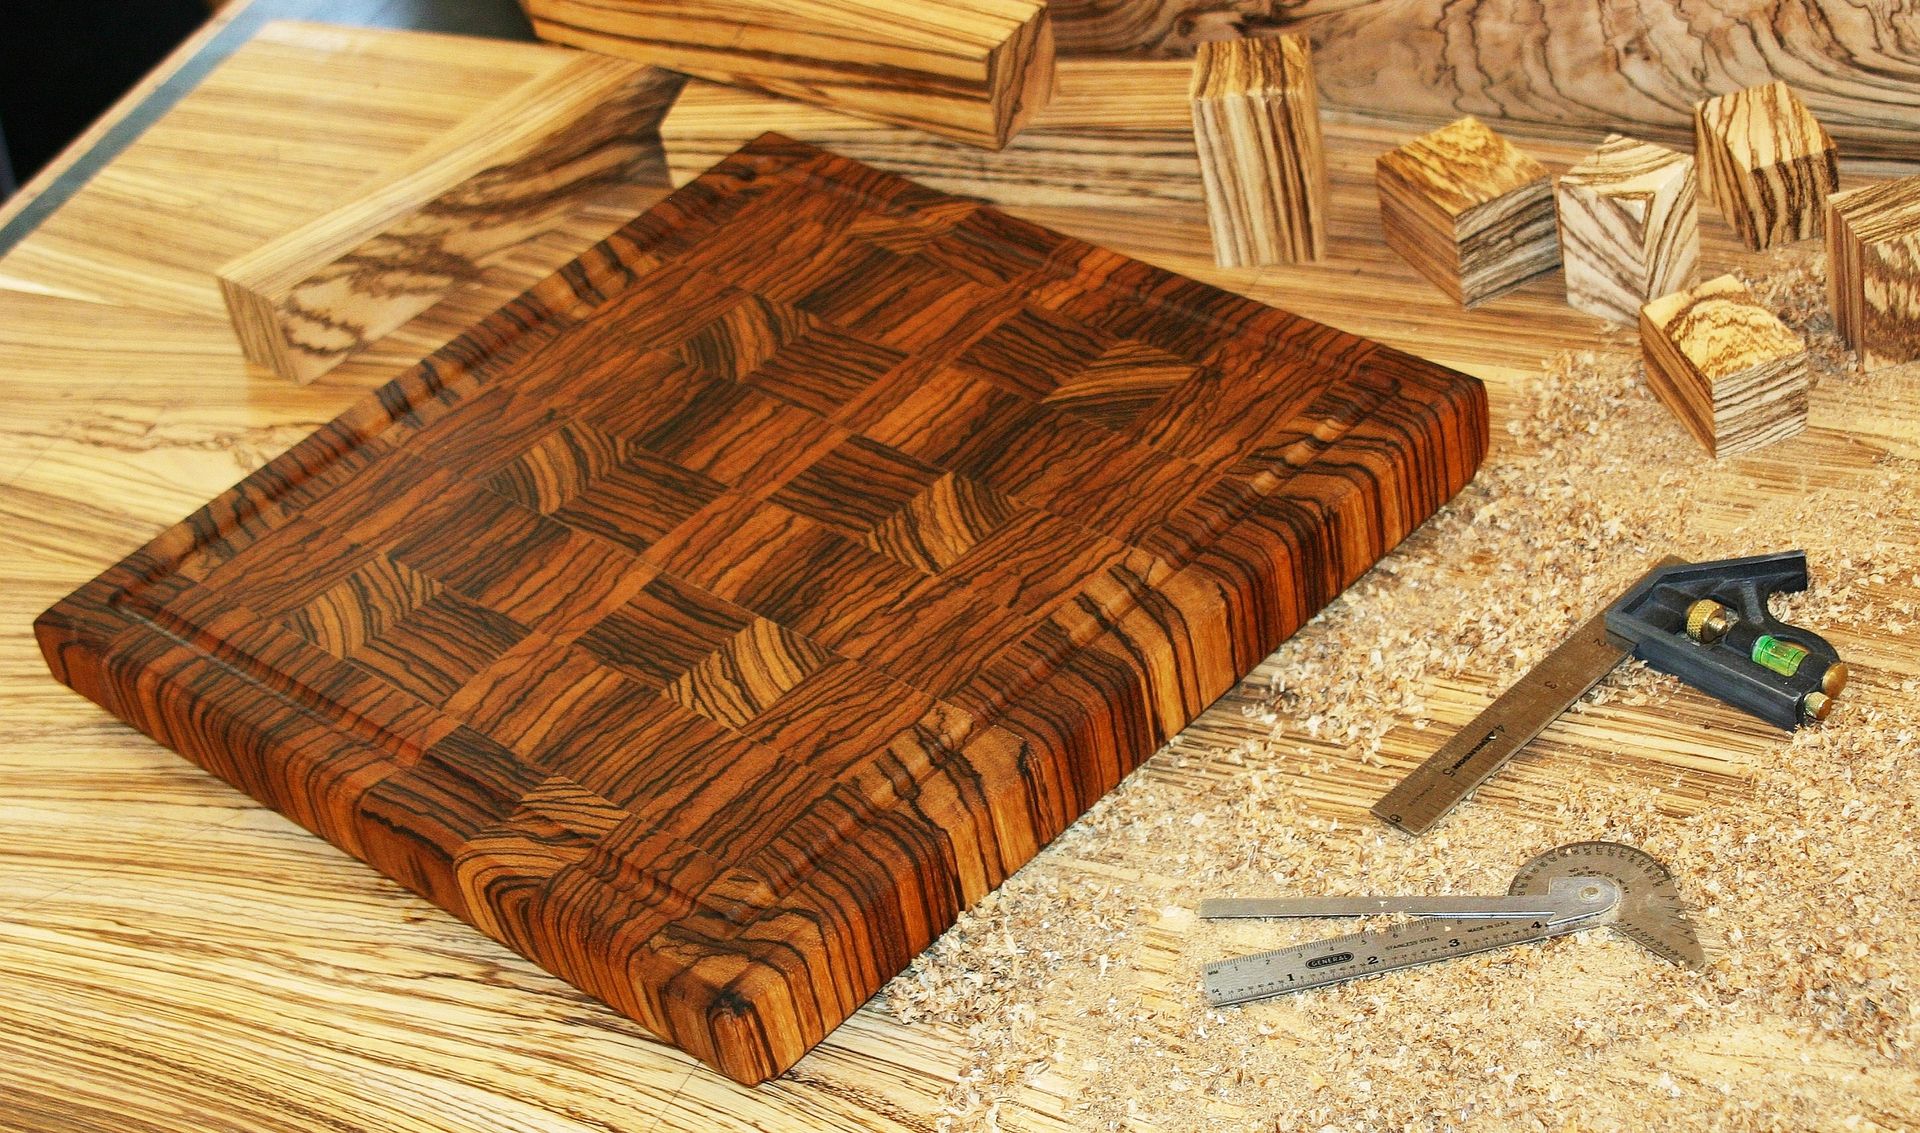
End Grain Cutting Board

End grain cutting boards are known for their durability and ability to stay sharp longer. This is because the end grain is denser than the side grain, making it more resistant to knife damage.

Features and Benefits

  • Exceptional durability and knife-friendliness
  • Helps keep knives sharper for longer
  • Unique and visually appealing

Tips for Creating

  • Use a hardwood such as maple, cherry, or walnut
  • Cut the wood into small blocks and glue them together to create the end grain pattern
  • This can be a more time-consuming process than making a traditional cutting board
  • The end grain will need to be properly sealed to prevent moisture from seeping in

Butcher Block Cutting Board

Butcher block cutting boards are typically made from large pieces of hardwood, such as maple or walnut. They are known for their durability, stability, and rustic appeal. They are often used by professionals, but are also becoming increasingly popular in home kitchens.

Features and Benefits

  • Heavy-duty construction for lasting durability
  • Offers a large surface area for working
  • Can be made in a variety of shapes and sizes

Tips for Creating

  • Use a hardwood that is known for its stability, such as maple or walnut
  • The board should be properly sealed and treated to prevent moisture damage
  • Consider adding a decorative edge detail for a more upscale look

Cheese Board Cutting Board

A cheese board is a cutting board that is specifically designed for serving cheese. They often feature compartments or grooves for holding different types of cheese, crackers, and other snacks. The design can be very simple or quite elaborate.

Features and Benefits

  • Stylish and functional for serving cheese
  • Can be made in a variety of sizes and shapes
  • Often includes compartments or grooves for holding cheese, crackers, and other snacks

Tips for Creating

  • Choose a wood that is aesthetically pleasing and easy to work with, such as maple, cherry, or walnut
  • Add compartments for cheese and snacks by using a router or hand tools to cut the design
  • A simple design is usually the most practical

Serving Trays

Serving trays can double as cutting boards. They are often made from a variety of materials, including wood, metal, and plastic. They are usually a rectangular shape with a handle.

Features and Benefits

  • Versatile for both serving and cutting
  • Can be made in a variety of sizes and styles
  • Handle for easy carrying

Tips for Creating

  • Choose a wood that is aesthetically pleasing and easy to work with, such as maple, cherry, or walnut
  • Add a handle to the tray for easy carrying
  • Ensure the tray is properly sealed and finished to prevent moisture damage

Unique and Personalized Cutting Board Designs

In addition to the classic designs, there are also many unique and personalized cutting board designs that are becoming increasingly popular. You can use various techniques, such as:

Inlays and Intarsia

Inlay and intarsia techniques can be used to create intricate designs on cutting boards.

Engraving

Engraving can be used to add personalized touches, such as names, dates, or special messages, to cutting boards.

Etching

Etching can be used to create unique designs and patterns on cutting boards.

Burned Designs

Wood burning techniques can be used to add decorative designs to cutting boards.

Marketing and Selling Your Cutting Boards

Once you have created your cutting boards, it is important to market and sell them effectively. Here are some tips for success:

High-Quality Photography

Take high-quality photos of your cutting boards and showcase them on your website and social media.

Online Marketplaces

Sell your cutting boards online through platforms such as Etsy, Amazon Handmade, and Shopify.

Craft Fairs and Markets

Attend craft fairs and markets to sell your cutting boards in person and connect with customers.

Social Media Marketing

Use social media to promote your cutting boards and engage with potential customers.

Conclusion

By understanding the top-selling cutting board designs, you can create high-quality, functional, and beautiful pieces that customers will love. Remember to offer a variety of options, including classic designs, personalized touches, and unique styles. Marketing and selling your cutting boards effectively can help you build a successful woodworking business.

Share:

How to Build Wooden Benches for Patio and Garden Furniture Sets

How to Build Wooden Benches for Patio and Garden Furniture Sets

Building Wooden Benches for Your Patio and Garden: A Step-by-Step Guide

Hey there, DIY enthusiasts! Are you ready to transform your outdoor space into a haven of comfort and style? Look no further than building your own wooden benches! Not only is it a rewarding project, but it also allows you to customize the design to match your existing furniture and personal taste. Get ready to unleash your inner carpenter and let's dive into the world of wooden bench building!

Choosing the Right Wood

Before we get our hands dirty, let's talk about the heart of your bench â€" the wood! There are a plethora of options available, each with its own unique characteristics. Here's a breakdown to help you make the right choice:

Durable and Weather-Resistant Choices:

  • Cedar: A natural beauty known for its rich aroma and exceptional resistance to rot, insects, and weather. It's a bit pricey, but its longevity makes it a worthwhile investment.
  • Redwood: Another top-tier option that boasts natural resistance to moisture and decay. Its warm reddish-brown color adds a touch of elegance to any outdoor setting.
  • Teak: Renowned for its durability, teak is incredibly resistant to weathering and pests. It's often used for high-end outdoor furniture and comes with a hefty price tag.

Budget-Friendly and Practical Choices:

  • Pressure-Treated Pine: An affordable and reliable choice for outdoor projects. It's been treated to withstand moisture and decay, making it ideal for benches that will be exposed to the elements.
  • Cypress: This durable wood is known for its natural resistance to rot and insects. It's a good alternative to cedar and redwood, offering a more affordable price point.

Remember, the choice ultimately comes down to your budget, desired aesthetic, and the level of durability you require.

Planning Your Bench Design

Now that you've chosen your wood, it's time to get creative! There are countless bench designs to inspire you, but here are a few basic elements to consider:

Bench Dimensions:

  • Length: Consider the space available and how many people you want to seat.
  • Width: A standard bench width is around 16-18 inches, providing ample room for comfortable seating.
  • Height: Aim for a height of 16-18 inches for easy access and comfortable sitting.

Bench Style:

  • Traditional: A classic design with straight lines and a simple, rectangular shape.
  • Curved: Adds a touch of elegance and visual interest with gently curved seat and back.
  • A-Frame: A sturdy design with a distinctive angled frame, providing a rustic and charming look.

Extra Features:

  • Backrest: Add a backrest for extra comfort, adjusting its height and angle according to your preference.
  • Arms: Incorporate arms for added support and a more luxurious feel.
  • Storage Compartment: Design a hidden storage space under the seat to keep cushions, blankets, or tools organized.

Gathering Your Tools and Materials

Before you start building, ensure you have all the necessary tools and materials ready:

Tools:

  • Measuring tape
  • Pencil
  • Circular saw or table saw
  • Hand saw
  • Drill with drill bits
  • Screwdriver or drill driver
  • Clamps
  • Level
  • Hammer
  • Sandpaper (various grits)
  • Safety glasses
  • Work gloves

Materials:

  • Wood of your choice (based on dimensions of your design)
  • Wood screws (size and type depending on wood and design)
  • Wood glue (optional)
  • Finish of your choice (paint, stain, sealant)

Building Your Wooden Bench: Step-by-Step

Let's get down to business! Follow these step-by-step instructions to bring your wooden bench to life:

1. Cut the Wood:

  • Cut all the necessary pieces of wood according to your chosen design and dimensions. Make sure to double-check your measurements before cutting.

2. Assemble the Frame:

  • Join the side rails and legs to create the frame. You can use screws, wood glue, or a combination of both. Make sure the frame is square and level before proceeding.

3. Attach the Seat and Backrest (if applicable):

  • Attach the seat boards to the frame, ensuring they are flush and secure.
  • If adding a backrest, attach it to the frame using screws or dowels.

4. Add Arms (if applicable):

  • Attach the armrests to the frame using screws or dowels, making sure they are level with the seat.

5. Sand and Finish:

  • Sand all the wood surfaces using different grit sandpapers to achieve a smooth finish. This will enhance the look of your bench and make it more comfortable to sit on.
  • Apply your chosen finish, whether it's paint, stain, or sealant. Allow the finish to dry completely before using your bench.

Commonly Asked Questions

1. What kind of screws should I use?

The best type of screws to use will depend on the type of wood you are using and the design of your bench. For most wooden benches, it is recommended to use deck screws, as they are designed for outdoor use and are resistant to rust and corrosion.

2. Should I use wood glue?

Using wood glue in addition to screws can make your bench stronger and more durable, especially if you are using softer woods.

3. How can I prevent my bench from rotting?

Choosing weather-resistant wood, such as cedar or redwood, is a great way to prevent rot. You can also apply a water sealant to protect the wood from moisture and extend its lifespan.

4. What is the best way to clean my wooden bench?

Use a mild soap and water solution to clean your wooden bench. Avoid using harsh chemicals, as they can damage the finish.

There you have it! Building your own wooden benches is a fulfilling journey that combines creativity, practicality, and a touch of craftsmanship. Remember to enjoy the process, take your time, and let your imagination guide you as you bring your vision to life. Happy building!

Share:

Dado Joinery: An Essential Technique for Stronger Furniture

Dado Joinery: An Essential Technique for Stronger Furniture

Dado Joiners: An Essential Technique for Stronger Furniture

In the world of woodworking, strength and stability are paramount. Building furniture that stands the test of time requires more than just aesthetic appeal; it demands robust construction. Enter the dado joint, a venerable woodworking technique that has been used for centuries to create incredibly strong and durable furniture.

The dado joint, often referred to as a "dado," is a groove cut into a piece of wood that perfectly receives a corresponding tongue or tenon cut into another piece. Imagine two pieces of wood interlocked like puzzle pieces, but instead of flat surfaces, the pieces are joined by a groove and tongue. This interlocking system creates a highly resistant and durable connection, resisting both shear and tensile forces.

Why Choose Dado Joints?

Dado joints offer numerous advantages over other joinery techniques. Their strength and stability make them ideal for constructing furniture that will withstand the rigors of everyday use.

Strength and Stability

The interlocking nature of dado joints provides exceptional strength and stability. The broad surface area of the dado and tongue creates a strong bond that resists forces trying to pull the pieces apart or slide them past each other. This stability is crucial for ensuring furniture remains sturdy and functional over time.

Versatility

Dado joints can be used in a wide range of applications. They are commonly used for assembling tabletops, cabinet sides, and drawer boxes. Their adaptability makes them a versatile tool in any woodworker's arsenal.

Aesthetic Appeal

While not always visible, dado joints can be incorporated into a piece's design to add a touch of sophistication. The clean lines of the joint can enhance the visual appeal of a piece, contributing to a more polished and professional finish.

Cutting Dado Joints

Cutting dado joints accurately requires precision and skill. A dado blade, a specialized saw blade with multiple cutting teeth, is used for this purpose. The dado blade is mounted on a table saw or a dado stack jig.

To cut a dado joint, you must first measure and mark the wood precisely. Next, you must set the dado blade to the desired width and depth. With the blade properly adjusted, you can then cut the groove into the wood, using a slow and steady feed rate.

Consistency is crucial. To achieve a perfect fit, the dado and tongue must be cut to the same dimensions. This ensures a snug and secure connection between the pieces.

Mastering Dado Joiners: Tips for Success

Dado joints, while powerful, require careful execution. Here are some tips to help you master this essential technique:

  • Measure Twice, Cut Once: Accuracy is paramount. Double-check your measurements to ensure a perfect fit.
  • Practice Makes Perfect: Begin by practicing on scrap wood to familiarize yourself with the cutting process.
  • Use a Dado Stack Jig: A dado stack jig is a valuable tool for achieving precise cuts. It holds the dado blade at the correct depth and width, making the cutting process more controlled and accurate.
  • Work Slowly and Steadily: Avoid rushing the cutting process. A slow and steady feed rate will help to prevent tearing or chipping of the wood.
  • Finish the Joint: After cutting the dado and tongue, sand the edges smooth for a clean and professional finish.

Conclusion

Dado joints are an essential technique for creating strong and durable furniture. The interlocking nature of this joint provides exceptional strength and stability, making it an ideal choice for a wide range of applications. By mastering this fundamental woodworking skill, you can elevate your furniture-making abilities and craft pieces that are both beautiful and built to last.

Share:

Beautiful Wood Project Ideas for Every Season of the Year

Beautiful Wood Project Ideas for Every Season of the Year

Beautiful Wood Project Ideas for Every Season of the Year

Hey there, fellow woodworkers and craft enthusiasts! Are you looking for some inspiration to bring the warmth and beauty of wood into your home and life? Well, you've come to the right place. We're about to dive into a world of woodworking projects, each perfect for a different season of the year. Get ready to unleash your creativity and turn those wood scraps into stunning masterpieces!

Spring: Time to Bloom with Wooden Wonders

Spring is all about new beginnings, fresh starts, and a burst of color. Why not reflect that energy in your woodworking projects? Here are some ideas that will make your home feel like a blooming garden:

A Birdhouse for Feathered Friends

Imagine the joy of watching birds flitting around your handcrafted birdhouse. It's a simple project that can be customized with different designs and colors to match your garden's aesthetic. You can even add a little bird bath to create a welcoming haven for your winged neighbors.

Wooden Planters for Blooming Beauty

Add a touch of rustic elegance to your garden or balcony with handcrafted wooden planters. You can create simple rectangular planters or get creative with unique shapes and sizes. Adding a decorative stain or paint can really make them pop!

A Flower-Themed Wall Clock

Want to add a whimsical touch to your kitchen or living room? Create a wooden wall clock with a floral theme. You can use laser-cut wood pieces to create flower shapes, or you can even incorporate dried flowers into the design. It's a unique way to bring the beauty of spring indoors.

Summer: Sun-Kissed Wood Projects

Summer is all about sunshine, relaxation, and outdoor fun. Let's create some wood projects that perfectly embody that summer vibe:

A Sturdy Wooden Picnic Table

Gather your friends and family around a beautiful, hand-crafted picnic table. This is a great project for beginner woodworkers as it involves simple cuts and assembly. You can personalize it with a natural wood finish or paint it in bright summer colors.

A Sun-Catching Wind Chime

As the summer breeze whispers through the trees, let the gentle tinkling of a wooden wind chime fill your backyard with tranquility. You can use different types of wood to create a beautiful assortment of sounds.

A Wooden Serving Tray for Summer Cocktails

Create a functional and stylish serving tray for summer cocktails and snacks. You can add handles for easy carrying, and personalize the tray with a custom design or engraving. Imagine serving your guests cool drinks on a beautiful wooden tray you crafted yourself!

Autumn: Embracing the Warmth of Fall

As the leaves turn vibrant hues and the air grows crisp, there's a certain charm to autumn. Let's capture that warmth and beauty in our wooden projects:

A Cozy Wooden Candle Holder

Create a comforting ambiance in your home with a hand-crafted wooden candle holder. You can choose from simple designs or get creative with intricate shapes and carvings. Use a natural wood finish to complement the autumn colors.

A Wooden Pumpkin Decoration

Autumn wouldn't be the same without pumpkins! Carve a wooden pumpkin from a block of wood and decorate it with paints, stencils, or even woodburning techniques. It's a fun and festive way to add some autumn charm to your home.

A Wooden Serving Board for Fall Feasts

Autumn is the season for delicious feasts! Craft a beautiful wooden serving board to showcase your culinary creations. You can personalize it with engraved designs or a hand-painted finish. It's the perfect way to add a touch of warmth and style to your Thanksgiving table.

Winter: Bringing Warmth and Comfort to the Cold

Winter is the time for cozy nights by the fireplace, hot chocolate, and the soft glow of candlelight. Here are some woodworking project ideas to bring that warm and inviting winter spirit into your home:

A Wooden Snow Globe

Capture the magic of winter with a handcrafted wooden snow globe. You can create a whimsical scene inside with miniature figurines, glitter, and faux snow. It's a perfect gift for the holiday season or a beautiful addition to your winter decor.

A Cozy Wooden Blanket Box

Add a touch of rustic charm to your bedroom with a wooden blanket box. You can use reclaimed wood for a vintage feel or opt for a more modern design. It's the perfect place to store blankets, throws, and other winter essentials.

A Wooden Ornament for the Holiday Tree

Make your holiday tree extra special with handcrafted wooden ornaments. You can carve shapes, paint designs, or even use woodburning techniques to create unique and memorable ornaments. It's a fun way to personalize your Christmas decorations.

Commonly Asked Questions

What kind of wood should I use for these projects?

The best wood for your project will depend on your specific design and budget. For beginner-friendly projects, consider softwoods like pine or fir. Hardwoods like oak, maple, and walnut offer durability and a beautiful grain pattern. Explore different woods and see what speaks to you!

What tools do I need for woodworking?

You'll need basic tools like a saw, hammer, screwdriver, and measuring tape. If you're tackling more advanced projects, consider investing in a table saw, router, and sander. There are many affordable options available for both beginners and seasoned woodworkers.

Where can I get help if I'm stuck?

Don't worry, there are plenty of resources to help you along the way! Check out online woodworking communities, YouTube tutorials, or local woodworking classes. You can also find inspiration and guidance from experienced woodworkers in your community.

Let your imagination run wild and create stunning wood projects for every season. Happy crafting!

Share:

How to Build Wooden Jewelry Boxes with Multiple Compartments for Organization

How to Build Wooden Jewelry Boxes with Multiple Compartments for Organization

Building Wooden Jewelry Boxes with Multiple Compartments for Organization

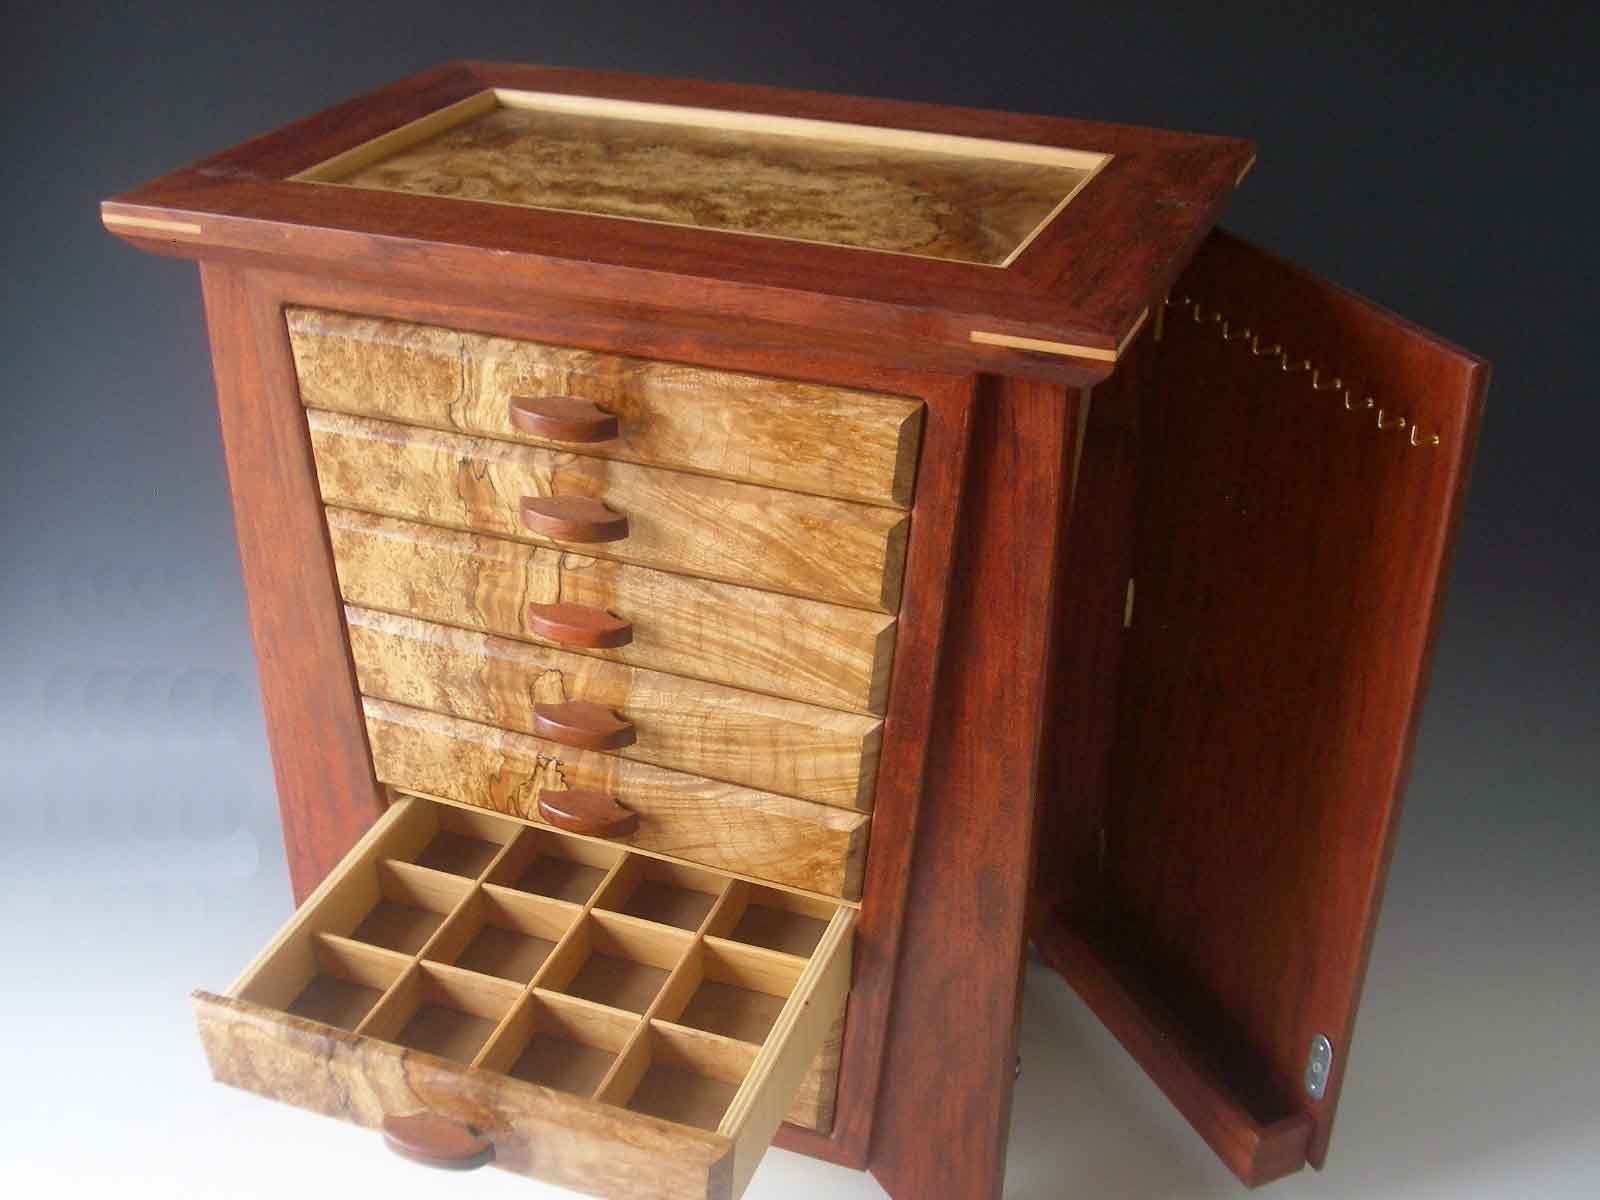
A well-organized jewelry collection is a joy to behold. Not only does it make finding your favorite pieces a breeze, but it also preserves their beauty and prevents tangles. Building your own wooden jewelry box with multiple compartments allows you to tailor the storage solution to your specific needs and style. This project combines the satisfaction of woodworking with the practicality of organization, creating a piece that will be cherished for years to come.

Step 1: Planning and Design

Before you grab your tools, take some time to envision your ideal jewelry box. Consider the size, shape, and number of compartments you desire. A sketch or simple drawing can help you visualize the project. Think about the types of jewelry you'll be storing, as this will influence the size and configuration of the compartments.

Size and Shape

The size of your box should accommodate your jewelry collection without feeling overcrowded. A rectangular box is a classic choice, but you can experiment with different shapes, like a square, octagon, or even a heart shape for a unique touch.

Compartments

Multiple compartments allow you to organize your jewelry by type, size, or color. Consider using different sized compartments for rings, necklaces, earrings, and bracelets. A dedicated section for watches or brooches can be helpful as well. You can even add a small drawer for loose items or delicate pieces.

Step 2: Gathering Materials

You'll need a few key materials to construct your jewelry box. The specific materials will depend on your design, but here's a general list:

  • Wood: Choose a durable wood that can be easily worked with, such as pine, oak, or maple. The thickness of the wood will determine the box's sturdiness.
  • Plywood: Useful for the box's base and lid, providing stability.
  • Wood Glue: Use a strong wood glue for secure bonding.
  • Wood Screws: To fasten the box's sides and lid securely.
  • Finishing Nails: For attaching decorative trim or accents.
  • Sandpaper: To smooth the wood and create a polished finish.
  • Wood Stain or Paint: To enhance the wood's natural beauty or create a custom color.
  • Hardware: Hinges, clasps, and decorative elements like knobs or handles.
  • Felt: For lining compartments to protect jewelry and prevent scratches.

Step 3: Cutting and Assembling the Box

With your materials ready, it's time to bring your design to life. Use a saw to cut the wood to your desired dimensions. You can use a table saw, circular saw, or jigsaw, depending on your tools and comfort level.

Cutting the Sides

Cut four pieces of wood for the sides of the box. Ensure the pieces are the same height and length.

Cutting the Base and Lid

Cut two pieces of plywood or wood for the base and lid, ensuring they are slightly larger than the base of the box to create a secure fit.

Assembling the Box

Using wood glue and screws, assemble the sides of the box. Align them carefully and secure them together. Once dry, attach the base to the box sides using screws or nails.

Step 4: Creating Compartments

To create compartments, you can use wood dividers or build them directly into the box structure.

Wood Dividers

Measure and cut pieces of wood for the dividers. These dividers will be the walls of your compartments. Glue and secure them in place, creating the desired compartment configuration.

Built-in Compartments

If you prefer built-in compartments, you can cut the box's base to create separate sections. Cut a piece of plywood or wood to fit inside the box as a false bottom. Mark out the desired compartment sizes on the false bottom and cut them out. Secure the false bottom to the box's base to create compartments.

Step 5: Finishing Touches

The finishing touches are what make your jewelry box truly unique.

Sanding and Staining or Painting

Smooth any rough edges and imperfections with sandpaper. Apply a wood stain or paint to enhance the wood's natural beauty or create a specific look.

Felt Lining

Line the compartments with felt to protect your jewelry and provide a soft resting surface. You can cut the felt to fit each compartment or use a single piece for the entire box.

Adding Hardware

Attach hinges to the lid, secure a clasp, and install any decorative elements, such as knobs or handles.

Step 6: Enjoying Your Creation

Congratulations! You've built a beautiful and functional wooden jewelry box with multiple compartments. Fill it with your precious pieces, arrange them thoughtfully, and enjoy the satisfaction of knowing you created a personalized storage solution that will bring joy for years to come.

Share:

Modern Wood Toolbox Organizer Designs That Shoppers Love

Modern Wood Toolbox Organizer Designs That Shoppers Love

Modern Wood Toolbox Organizer Designs That Shoppers Love

In a world of cluttered garages and messy workshops, a well-organized toolbox is a sanctuary of order. But beyond simple storage, modern wood toolbox organizers are transforming the way we approach our tools, making them not just functional, but stylish and personalized expressions of our passion for crafting, fixing, and building.

The Allure of Wood

Wood has always been a favorite material for toolboxes. Its natural beauty, durability, and warmth bring a classic touch to any workspace. However, modern designers are pushing the boundaries of wood craftsmanship. They're using unique wood species, incorporating intricate carving, and exploring different finishes to create toolboxes that are as much art as they are function.

Beyond the Basics: A World of Design

Gone are the days of bland, generic toolboxes. Modern wood organizers offer a wealth of design options. Here are just a few of the trends captivating shoppers:

  • Minimalist Designs: Sleek, clean lines with a focus on functionality and simplicity. These toolboxes often feature open compartments and magnetic strips for easy access to tools.
  • Rustic Charm: Reclaimed wood, distressed finishes, and hand-forged hardware bring a vintage, farmhouse aesthetic to the modern toolbox.
  • Industrial Chic: Bold, geometric designs with metal accents and exposed wood grain create a modern, industrial vibe.
  • Personalized Touch: Engraving, custom finishes, and personalized labels allow toolboxes to reflect the owner's individual style and interests.

Functionality Meets Form

Modern wood toolboxes are not just about aesthetics; they are thoughtfully designed to optimize tool storage and organization.

Clever Compartmentation

These toolboxes feature adjustable dividers, specialized compartments, and even dedicated slots for specific tools like screwdrivers, pliers, and wrenches. This eliminates wasted space and ensures that every tool has its designated place.

Innovative Features

Many modern wood organizers go beyond basic storage. Some include:

  • Magnetic strips: Hold tools securely and make them easily accessible.
  • Pull-out drawers: Provide extra storage and organization for smaller items.
  • Built-in work surfaces: Transform the toolbox into a functional workstation.
  • Integrated tool holders: Securely hold tools like hammers and screwdrivers without taking up valuable drawer space.

Investing in Quality

A well-crafted, modern wood toolbox organizer is an investment. The high-quality materials and intricate design ensure durability and longevity. You're not just buying storage; you're investing in a piece of craftsmanship that will enhance your workspace and last for years to come.

Beyond the Garage: A Versatile Solution

Modern wood toolboxes are not limited to the garage or workshop. Their versatility extends to other areas of the home and even into the office. They make excellent storage solutions for:

  • Home office supplies: Pens, pencils, paper clips, and other essentials can be organized with style.
  • Craft supplies: Art materials, sewing tools, and scrapbooking supplies are easily sorted and stored.
  • Kitchen gadgets: Organize cooking utensils, baking tools, and other kitchen essentials.

In a world filled with disposable products, modern wood toolboxes offer a welcome alternative. They represent a commitment to quality, craftsmanship, and personalized organization. Whether you're a seasoned craftsman or a weekend DIY enthusiast, these beautiful and functional organizers are sure to elevate your workspace and inspire your next project.

Share:

Compact DIY Toolbox Organizers That Save Space

Compact DIY Toolbox Organizers That Save Space

Compact DIY Toolbox Organizers That Save Space

Tired of a cluttered toolbox that makes finding the right tool a frustrating scavenger hunt? Don't settle for a chaotic mess! Transform your toolbox into an organized haven with these ingenious DIY organizers that maximize space and keep everything in its place.

Repurposed Containers for Maximum Organization

Don't throw away those empty containers! Repurposing them into toolbox organizers is an eco-friendly way to save space and money. Consider using:

Plastic Food Containers

Empty plastic containers, from deli tubs to margarine containers, are perfect for holding small hardware like screws, nuts, and washers. Label them clearly for easy identification. Use adhesive labels or write directly on the containers with permanent markers.

Egg Cartons

Don't underestimate the versatility of an egg carton! Its individual compartments are ideal for organizing small tools like screwdrivers, pliers, and wrenches. You can even use it to store nails and screws vertically, keeping them organized and easily accessible.

Plastic Water Bottle Cuttings

Give those empty plastic water bottles a second life! Cut them into different sizes and shapes to create custom organizers for tools of different lengths and diameters. The flexible plastic allows for easy customization, making them perfect for storing drill bits, screwdrivers, and other long tools.

Vertical Storage for Compact Solutions

Maximize your toolbox's vertical space with these DIY solutions.

Magnetic Strips

Attach magnetic strips to the inside of your toolbox lid or sides. This will allow you to store metal tools like screwdrivers, pliers, and wrenches securely and within easy reach.

Pegboard

Install a pegboard on the inside of your toolbox lid for even more storage options. Use hooks and clips to hang tools, measuring tapes, and other accessories. The pegboard's holes also provide convenient spots for storing screwdrivers and other tools with handles.

DIY Tool Holders

Create your own tool holders using materials like PVC pipes, wood scraps, or even cardboard. Use these holders to store screwdrivers, pliers, and other hand tools vertically, maximizing vertical space and keeping them organized.

Additional Tips for a Perfectly Organized Toolbox

Here are some extra tips to make your toolbox organization even more efficient:

  • Use dividers: Install dividers within your toolbox to separate different categories of tools, like wrenches, screwdrivers, and hammers.
  • Label everything: Make sure to label every compartment and tool holder clearly so you can find what you need quickly.
  • Store your toolbox in a well-lit area: Good lighting will make it easier to see what you're doing and find the tools you need.
  • By implementing these DIY toolbox organizers, you'll finally have a well-organized toolbox that makes it easy to find the tools you need, when you need them. Enjoy the satisfaction of a tidy workspace and the efficiency of a streamlined tool search!

    Share:

    Profitable Pencil Holder Projects to Make and Sell

    Profitable Pencil Holder Projects to Make and Sell

    Profitable Pencil Holder Projects to Make and Sell

    In the realm of crafting and entrepreneurship, pencil holders offer a compelling avenue for creativity and profitability. These humble desk accessories have the potential to transform into delightful and functional works of art that can captivate customers and boost your earnings.

    The beauty of pencil holders lies in their versatility. They can be crafted from an array of materials, incorporating various techniques and designs. Whether you prefer working with wood, metal, fabric, or recycled materials, the possibilities are endless. By harnessing your ingenuity and tailoring your creations to meet market demand, you can carve out a lucrative niche in the world of handmade goods.

    Materials and Techniques for Pencil Holder Projects

    The materials and techniques you choose for your pencil holder projects will significantly influence the final product's aesthetic and price point. Here's a breakdown of some popular options:

    Wood

    Wood is a timeless and versatile material that lends itself well to crafting pencil holders. The natural grain patterns and warm hues of wood can add a touch of rustic charm or sophistication, depending on the chosen species and finish. Popular woodworking techniques for pencil holders include:

    • Carving: Intricate designs can be carved into the wood using chisels and gouges, creating unique and eye-catching pieces.
    • Turning: Lathes can be used to create cylindrical or tapered pencil holders with smooth, polished surfaces.
    • Pyrography: Wood burning techniques allow you to create intricate designs and patterns on the surface of the wood, adding visual depth and complexity.

    Metal

    Metal offers a durable and modern alternative for pencil holders. Its sleek and minimalist aesthetic can complement contemporary office spaces. Metalworking techniques for pencil holders include:

    • Welding: Metal pieces can be welded together to create geometric or abstract designs, adding a touch of industrial chic.
    • Hammering: Metal can be hammered into various shapes and patterns, creating textured and eye-catching surfaces.
    • Metal stamping: Using stamps and a hammer, you can create designs and patterns on sheet metal, adding personalization and detail.

    Fabric

    Fabric provides a soft and colorful approach to pencil holders. It allows for endless creative possibilities, from intricate embroidery to playful patchwork designs. Common fabric techniques include:

    • Sewing: Fabric can be sewn together to create pouches, cylinders, or other shapes, allowing for various organizational compartments and decorative features.
    • Crocheting or Knitting: Yarn can be crocheted or knitted into cylindrical or rectangular pencil holders, adding a cozy and handmade touch.
    • Quilting: Patchwork fabric pieces can be stitched together to create vibrant and personalized designs.

    Recycled Materials

    Upcycling and repurposing everyday items into pencil holders is an eco-friendly and cost-effective approach. Creative ideas include:

    • Tin Cans: Empty tin cans can be cleaned, painted, and embellished to create sturdy and unique pencil holders.
    • Plastic Bottles: Cut and decorated plastic bottles can be transformed into stylish and sustainable pencil holders.
    • Wine Bottles: Wine bottles can be cut, sanded, and painted to create elegant and whimsical pencil holders.

    Design and Decoration

    The design and decoration of your pencil holders are key to their appeal and marketability. Consider these factors:

    Style and Theme

    Align your designs with popular trends and aesthetic preferences. Some popular themes include:

    • Rustic: Wood, burlap, and twine can evoke a cozy and natural vibe.
    • Modern: Clean lines, geometric shapes, and metallic finishes create a sleek and contemporary look.
    • Vintage: Antique-inspired designs, distressed finishes, and floral patterns can add a touch of nostalgia.
    • Personalized: Incorporate names, initials, or special messages to create unique and sentimental gifts.

    Color and Pattern

    Use colors and patterns that complement your chosen theme and target audience. Explore bold and vibrant hues for a playful aesthetic or muted and earthy tones for a more sophisticated feel.

    Functionality and Organization

    Consider the practical needs of your customers. Design pencil holders that are spacious enough to hold various writing tools and stationery. You can incorporate compartments, slots, or other features to enhance organization.

    Finishing Touches

    Add finishing touches to elevate your pencil holders from simple accessories to handcrafted treasures. Consider these options:

    • Polishes and Finishes: Wood can be stained, varnished, or waxed to enhance its natural beauty and durability.
    • Hardware: Add decorative screws, hinges, or handles to enhance the design and functionality.
    • Embellishments: Incorporate embellishments like beads, buttons, ribbons, or charms to add personality and visual interest.

    Marketing and Selling Your Pencil Holders

    To successfully market and sell your pencil holders, you need a well-defined strategy that reaches your target audience. Here are some tips:

    Online Marketplaces

    Etsy, Amazon Handmade, and other online marketplaces offer a vast platform to showcase your creations to a global audience. Create compelling product listings with high-quality photos and detailed descriptions that highlight the unique features and benefits of your pencil holders.

    Social Media

    Utilize social media platforms like Instagram, Pinterest, and Facebook to share photos of your pencil holders, engage with potential customers, and promote your brand. Run contests, giveaways, and behind-the-scenes glimpses into your crafting process to foster a sense of community and build excitement.

    Local Craft Shows and Markets

    Participate in local craft shows and markets to connect directly with customers and promote your products in person. Showcase your pencil holders in an attractive and organized display, offering personalized service and answering questions about your creative process.

    Wholesale Opportunities

    Explore wholesale opportunities with boutiques, gift shops, or stationery stores that may be interested in carrying your handcrafted pencil holders. Offering competitive pricing and a consistent supply of high-quality products can lead to increased revenue and brand recognition.

    Conclusion

    Crafting and selling pencil holders is a rewarding and profitable endeavor that combines creativity with entrepreneurship. By exploring diverse materials and techniques, experimenting with design and decoration, and employing effective marketing strategies, you can establish a successful business that brings your artistic vision to life. Remember to embrace your unique style, invest in quality craftsmanship, and consistently strive to create pencil holders that are both functional and aesthetically pleasing. With dedication and passion, you can turn your pencil holder projects into a flourishing source of income and fulfillment.

    Share:

    Rustic Bath Tray Projects for Quick Profits

    Rustic Bath Tray Projects for Quick Profits

    Rustic Bath Tray Projects for Quick Profits

    In the realm of woodworking and crafting, rustic bath trays offer a captivating opportunity to tap into the ever-growing market for home decor and wellness products. These charming and functional pieces, crafted from natural materials like reclaimed wood, driftwood, or bamboo, exude a sense of warmth, tranquility, and handcrafted elegance that resonates deeply with modern consumers. This article will delve into the world of rustic bath tray projects, exploring their potential for quick profits, providing comprehensive guidance on design, construction, and marketing strategies.

    The Allure of Rustic Bath Trays

    Rustic bath trays have gained immense popularity in recent years, driven by several key factors:

    • Growing Trend towards Natural Materials: Consumers are increasingly seeking out products made from sustainable and eco-friendly materials. Reclaimed wood, driftwood, and bamboo embody this ethos, lending an authentic and timeless quality to bath trays.
    • Emphasis on Self-Care and Relaxation: The pursuit of well-being and stress reduction has become a central focus in contemporary lifestyles. Rustic bath trays create a soothing ambiance, inviting individuals to indulge in relaxing baths and spa-like experiences.
    • Uniqueness and Personalization: The handcrafted nature of rustic bath trays allows for endless customization and personalization. Each piece becomes a unique work of art, reflecting the individual tastes and preferences of the owner.
    • Versatility and Functionality: Beyond their aesthetic appeal, rustic bath trays offer practical benefits. They provide a convenient platform for holding books, candles, drinks, and other bath essentials, enhancing the overall bathing experience.

    Crafting Rustic Bath Trays: A Step-by-Step Guide

    Creating rustic bath trays is a rewarding and relatively straightforward process, even for beginners. Here's a step-by-step guide to get you started:

    Step 1: Gather Your Materials

    • Wood: Choose reclaimed wood, driftwood, or bamboo for a rustic aesthetic. Consider the size and shape of the tray you desire.
    • Hardware: You'll need screws, nails, wood glue, and possibly metal brackets for support.
    • Finishing: Select a sealant or stain to protect the wood and enhance its natural beauty.
    • Optional Accessories: Add handles, cups, or other embellishments to personalize your trays.

    Step 2: Design and Cut Your Wood

    Plan the dimensions and design of your bath tray. Sketch out your ideas or find inspiration online. Cut the wood to your specifications using a saw or a jigsaw. Remember to account for any overhang for the tray's sides.

    Step 3: Assemble the Tray

    Use wood glue and screws or nails to secure the sides of the tray to the base. Apply glue liberally to the joints and clamp the pieces together until the glue sets. Consider using metal brackets for extra support, especially if the tray is large or will hold heavy items.

    Step 4: Finishing Touches

    Sand the tray smooth to remove any rough edges or imperfections. Apply a sealant or stain to protect the wood and enhance its natural beauty. Allow the finish to dry completely before adding any handles, cups, or other decorative elements.

    Marketing Your Rustic Bath Trays: Strategies for Success

    Once you have crafted your rustic bath trays, it's time to bring them to market. Here are some effective strategies to reach your target audience:

    1. Online Marketplaces

    • Etsy: Etsy is a popular platform for handmade and vintage goods, attracting a large audience of design-conscious shoppers.
    • Amazon Handmade: Amazon offers a vast reach and a dedicated section for handmade products.
    • eBay: eBay is a global marketplace with a broad range of buyers, including those searching for unique and handcrafted items.

    2. Social Media

    • Instagram: Share stunning photos of your rustic bath trays in action, highlighting their aesthetic appeal and functionality. Use relevant hashtags to reach a wider audience.
    • Pinterest: Pinterest is an excellent platform for visual inspiration and product discovery. Create attractive pins showcasing your trays in different settings.
    • Facebook: Create a Facebook page for your business to engage with potential customers, share updates, and run targeted ads.

    3. Local Craft Fairs and Markets

    Participating in local craft fairs and markets allows you to connect directly with customers, showcase your work, and gain valuable feedback.

    4. Collaborations

    Collaborate with other artisans, retailers, or spas to expand your reach. Offer wholesale pricing or cross-promote each other's products.

    Tips for Maximizing Profits

    To maximize profits from your rustic bath tray venture, keep the following tips in mind:

    • Source Materials Wisely: Look for affordable reclaimed wood, driftwood, or bamboo. Consider repurposing old wooden crates or pallets.
    • Embrace Efficiency: Optimize your production process to create trays quickly and efficiently.
    • Experiment with Designs: Offer a range of designs to appeal to diverse tastes and preferences.
    • Promote Quality: Highlight the craftsmanship and sustainability of your rustic bath trays.
    • Offer Excellent Customer Service: Provide prompt responses to inquiries and address customer concerns with care.

    Conclusion

    Rustic bath trays represent a lucrative niche in the home decor and wellness market. By following the design and construction guidelines outlined in this article, you can create captivating and functional pieces that resonate with consumers seeking natural materials and a touch of handcrafted elegance. Marketing your creations through online marketplaces, social media, and local events will help you reach your target audience and establish a successful business. Embrace the creative possibilities and the potential for quick profits that await in the world of rustic bath tray projects.

    Share:

    Wooden Magazine Racks That Double as Display Stands for Magazines and Books

    Wooden Magazine Racks That Double as Display Stands for Magazines and Books

    Wooden Magazine Racks That Double as Display Stands

    Let's face it, magazines and books can quickly clutter up a room. But what if you could turn those piles of reading material into a stylish and functional display? That's where wooden magazine racks that double as display stands come in! These versatile pieces of furniture can not only keep your publications organized but also add a touch of warmth and personality to your space.

    Why Choose Wooden Magazine Racks?

    Wooden magazine racks offer a unique blend of practicality and aesthetic appeal. Here are some reasons why they stand out:

    Durability and Longevity

    Wood is a naturally strong and resilient material. A well-crafted wooden magazine rack will stand the test of time, providing years of reliable service. Unlike flimsy plastic or metal racks, wood won't bend or break easily, even when loaded with heavy books or magazines.

    Natural Beauty and Warmth

    Wood brings a touch of organic beauty and warmth to any room. Its natural grain patterns and rich tones create a welcoming and inviting atmosphere. Whether you prefer the rustic charm of reclaimed wood or the sleek elegance of polished hardwoods, there's a wooden magazine rack style to suit every taste.

    Versatility and Customization

    Wooden magazine racks come in various shapes, sizes, and styles, offering endless possibilities for customization. You can find racks with open shelves, drawers, or even built-in compartments for specific items. Some can be stained or painted to match your existing décor, while others come in a range of natural wood finishes.

    Types of Wooden Magazine Racks

    With so many options available, choosing the right wooden magazine rack can be exciting but also a bit overwhelming. Here's a breakdown of some common types:

    Free-Standing Racks

    These are the most traditional and versatile type. They typically have multiple shelves or compartments to accommodate various sizes of magazines and books. Free-standing racks are ideal for open areas like living rooms, family rooms, or entryways.

    Wall-Mounted Racks

    Space-saving and stylish, wall-mounted racks are a great choice for smaller rooms or apartments. They can be mounted directly to the wall, freeing up floor space. Many wall-mounted racks come with adjustable shelves to accommodate different publication sizes.

    Corner Racks

    As the name suggests, these racks are designed to fit perfectly in a corner. They are perfect for maximizing space in a small room and adding a touch of visual interest to an otherwise overlooked corner.

    Rolling Racks

    These racks feature wheels, making them highly mobile and easy to move around a room. They are a practical choice for those who frequently reorganize their space or need to access their publications from multiple locations.

    Tips for Choosing the Right Wooden Magazine Rack

    Here are some factors to consider when choosing a wooden magazine rack that fits your needs:

    Space Considerations

    Measure the space where you plan to place the rack to ensure it fits comfortably. Consider the width, depth, and height of the rack and make sure it doesn't block any pathways or doors.

    Style and Design

    Choose a rack that complements your existing décor and personal style. Consider the finish, material, and overall design of the rack and how it will blend in with the rest of your furniture.

    Functionality

    Think about how you will use the rack. If you need to store a large amount of magazines and books, a rack with multiple shelves or compartments might be best. If you prefer a more minimalist approach, a simple rack with a few shelves could be more suitable.

    Budget

    Wooden magazine racks can range in price from affordable to high-end. Set a budget and explore different options within your price range. Remember, a well-made wooden rack is an investment that will last for years.

    Beyond Storage: Displaying Your Magazines and Books

    Wooden magazine racks can do more than just store your publications. They can also be used to create eye-catching displays that showcase your favorite reads. Here are some tips for creating stunning magazine and book displays:

    Categorize Your Publications

    Group magazines and books together based on themes, topics, or genres. For example, you could create a display of travel magazines, a collection of cookbooks, or a shelf dedicated to your favorite authors.

    Play with Height and Depth

    Don't just stack everything flat on the shelves. Create visual interest by arranging publications at different heights and angles. You can also lean books against the back of the rack or prop them up on small decorative objects.

    Incorporate Accessories

    Add personal touches to your display with accessories like small plants, candles, or decorative boxes. These elements can create a more cohesive and welcoming atmosphere.

    Highlight Interesting Covers

    Make sure the most visually appealing covers are prominently displayed. You can even use magazine clips or bookends to keep them from getting lost in the stack.

    Commonly Asked Questions

    Where can I find wooden magazine racks?

    Wooden magazine racks are widely available online and in retail stores specializing in furniture, home decor, and office supplies. You can also find unique or handcrafted racks at local artisan markets or online marketplaces.

    How do I care for my wooden magazine rack?

    To keep your wooden magazine rack looking its best, dust it regularly with a soft cloth. Avoid using harsh cleaning products or abrasive materials that could damage the wood's finish. If necessary, you can use a mild wood cleaner or polish to remove any stubborn stains or dirt.

    Can I customize a wooden magazine rack?

    Yes, many wooden magazine racks can be customized. You can find racks that can be stained or painted to match your décor. Some manufacturers also offer custom options, allowing you to choose the size, material, and finish of your rack.

    How much does a wooden magazine rack cost?

    The price of a wooden magazine rack varies depending on the size, style, and material. You can find affordable options for under $100, while high-end handcrafted racks can cost several hundred dollars or more.

    Whether you're looking for a practical storage solution or a stylish way to showcase your reading material, wooden magazine racks that double as display stands are a versatile and attractive option. With a wide range of styles and designs to choose from, you're sure to find the perfect rack to enhance your home and inspire your reading habits.

    Share:

    Wooden Bench Projects with Built-in Storage Solutions

    Wooden Bench Projects with Built-in Storage Solutions

    Transform Your Outdoor Space with Wooden Benches Featuring Built-in Storage

    Tired of clutter in your backyard or on your patio? Imagine a space where you can relax and enjoy the fresh air, without tripping over gardening tools or toys. With a little creativity and some basic woodworking skills, you can transform your outdoor area with a beautiful and functional wooden bench that also doubles as a storage solution.

    Wooden benches with built-in storage offer a unique blend of practicality and aesthetics. They provide a comfortable seating option while discreetly concealing your belongings, making them ideal for maximizing space in any outdoor setting. This article will explore various designs and guide you through the process of crafting your own personalized storage bench.

    Types of Wooden Benches with Storage

    There are many ways to incorporate storage into a wooden bench, each offering distinct advantages and aesthetics. Let's explore some popular options:

    Traditional Storage Bench

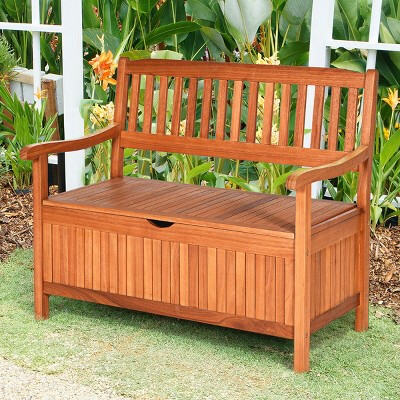
    This classic design features a hinged seat that lifts to reveal a spacious storage compartment underneath. The lid often includes a soft cushion for comfort and can be secured with simple latches or hinges. This design is perfect for storing bulky items like gardening tools, cushions, or blankets.

    Bench with Drawer Storage

    For easier access to smaller items, consider a bench with drawers. You can opt for a single large drawer or multiple smaller drawers depending on your storage needs. These drawers can be fitted with simple slide rails for smooth operation.

    Bench with Open Shelving

    Open shelving offers a less enclosed storage solution. These shelves can be located under the seat or integrated into the bench's sides. This design is ideal for displaying decorative items or storing frequently used tools.

    Materials and Tools

    To build your own wooden bench with storage, you'll need the following materials and tools:

    • Lumber: Choose durable hardwoods like cedar, redwood, or oak for weather resistance and longevity.
    • Wood glue: Provides a strong bond between wood pieces.
    • Wood screws: For assembling the bench frame and securing storage components.
    • Hinges: For attaching the hinged seat (if applicable).
    • Latches or locks: To secure the storage compartment.
    • Saw: For cutting wood to size.
    • Drill: For pilot holes and screwing in fasteners.
    • Sandpaper: For smoothing surfaces and preparing for finishing.
    • Wood stain or paint: To enhance the appearance and protect the wood from the elements.

    Building Your Own Wooden Bench with Storage

    Now that you have the necessary materials and tools, it's time to start building your bench. Here's a step-by-step guide:

    1. Plan your design: Determine the dimensions, storage features, and overall aesthetic you desire. Create a detailed plan or sketch to guide your construction.
    2. Cut the wood: Measure and cut the lumber precisely according to your plan. Ensure all cuts are straight and square for a sturdy and visually appealing bench.
    3. Assemble the frame: Join the wood pieces using wood glue and screws to create the bench's base and legs.
    4. Construct the storage component: Build the storage compartment, whether it's a hinged seat, drawers, or open shelving.
    5. Attach the seat: If you've opted for a hinged seat, secure it with hinges and latches or locks for easy access.
    6. Finish the bench: Sand the entire surface to achieve a smooth finish. Apply wood stain or paint to protect the wood and enhance its appearance.
    7. Enjoy your new bench: Once the finish dries, you can place your bench in your chosen location and start enjoying its functionality and aesthetic appeal.

    Tips for Success

    Building a wooden bench with storage requires some skill and patience. Here are some tips to help you along the way:

    • Use high-quality lumber: This ensures durability and longevity of your bench.
    • Measure twice, cut once: Precise measurements and accurate cuts are crucial for a sturdy and visually appealing bench.
    • Use a level: Make sure the bench is level and stable for comfortable seating.
    • Pre-drill holes: This prevents the wood from splitting when driving in screws.
    • Apply a protective finish: This helps preserve the wood and enhances its appearance, extending the life of your bench.

    Conclusion

    With a little effort and creativity, you can build a beautiful and functional wooden bench with storage that will enhance your outdoor space. This project allows you to showcase your woodworking skills while adding a touch of personalized style and functionality to your backyard, patio, or garden. So, gather your tools, embrace the challenge, and create a storage bench that perfectly complements your outdoor oasis.

    Share:

    How to Make Wooden Plant Stands That Are Ideal for Indoor Plants

    How to Make Wooden Plant Stands That Are Ideal for Indoor Plants

    Spruce Up Your Home with DIY Wooden Plant Stands

    Hey there, plant parents! Are you tired of your beloved greenery looking lost and lonely on the floor? Do you yearn for a stylish and functional way to elevate your indoor jungle? Well, you're in luck! Building your own wooden plant stands is a fun, rewarding project that can add a touch of elegance to your home while providing the perfect platform for your thriving plants.

    No need to fret if you're a DIY newbie. We'll walk you through the process step-by-step, from choosing the right wood to finishing touches. So grab your tools, unleash your inner carpenter, and let's get started on creating some stunning plant stand masterpieces!

    Gather Your Supplies

    Before we dive into the fun part, you'll need to assemble your trusty tools and materials. Here's a list to get you started:

    • Wood: Pine, cedar, or oak are popular choices for their durability and affordability. Consider the size and weight of your plants to choose the right thickness. You might need 1x2, 1x4, or even 1x6 inch boards.
    • Saw: A circular saw or jigsaw will make cutting the wood a breeze. A handsaw can also work, but requires more effort.
    • Screwdriver: You'll need a screwdriver to secure the pieces together. A drill with a bit that matches your screws can also be helpful.
    • Screws: Choose screws that are long enough to go through both pieces of wood you're joining. Use wood screws for a sturdy hold.
    • Measuring tape: This is essential for ensuring accurate cuts and overall dimensions.
    • Pencil: Mark your cut lines and any other details clearly on the wood.
    • Sandpaper: Smooth out any rough edges for a polished finish. Start with a coarse grit and gradually work your way to a finer grit.
    • Wood glue: Optional, but it adds extra strength and stability to your stand.
    • Finish (Optional): Stain, paint, or a clear sealant can give your stand a unique look and protect it from moisture.

    Choosing the Right Design

    The world of plant stand designs is your oyster! Browse online for inspiration, check out DIY blogs, or even sketch your own creation. Here are a few ideas to spark your creativity:

    • Classic Stand: A simple rectangular or square stand is perfect for displaying a single plant or a small grouping.
    • Tiered Stand: Add some visual interest with a stand that has multiple levels. This allows you to showcase a variety of plants at different heights.
    • Rustic Stand: Embrace the natural beauty of wood with a rustic design featuring knots and imperfections. Use reclaimed wood for an eco-friendly touch.
    • Modern Stand: Create a clean and minimalist look with sleek lines and geometric shapes.
    • Hanging Stand: Embrace vertical gardening with a stand that incorporates hanging planters.

    Building Your Wooden Plant Stand

    Now comes the fun part â€" actually building your plant stand! Remember, safety first! Wear safety glasses to protect your eyes and gloves to avoid splinters.

    Cut the Wood

    Using your chosen design, measure and mark the wood for cutting. Pay attention to the angles and lengths required for each piece. Cut carefully and accurately to ensure the stand is stable and fits your plants.

    Assemble the Stand

    Once you've cut all the pieces, you can start assembling your stand. Using a screwdriver or drill, secure the pieces together with wood screws. If you're using wood glue, apply a thin layer to each joint before screwing them together.

    Sand and Finish

    After assembling your stand, take some time to sand any rough edges and surfaces to ensure a smooth finish. If you're applying a stain or paint, make sure the wood is clean and dry before applying. Follow the instructions on your chosen finish for the best results.

    Finishing Touches

    With your plant stand completed, it's time to add some finishing touches. Here are a few ideas to personalize your creation:

    • Add some flair: Use stencils, paint, or decoupage to add a decorative touch. You can even create a personalized message or design.
    • Incorporate casters: Make your stand movable by adding casters to the bottom.
    • Experiment with lighting: Add some string lights or LED strips to highlight your plants and create a cozy ambiance.

    Tips for Success

    Here are some tips to help you create a truly exceptional plant stand:

    • Plan ahead: Sketch out your design and calculate the necessary measurements before you start cutting.
    • Use quality wood: Invest in good-quality wood to ensure your stand lasts for years to come.
    • Pre-drill holes: This will prevent the wood from splitting when you drive in screws.
    • Sand thoroughly: A smooth finish will enhance the look and feel of your stand.
    • Don't be afraid to experiment: Get creative and try out different designs and finishes.

    And there you have it! With a little time, effort, and creativity, you can easily build a stunning wooden plant stand to showcase your green beauties. So what are you waiting for? Get your tools ready, unleash your inner carpenter, and let the plant stand building begin!

    Share:

    Spa-Style Bath Tray Projects That Are Easy to Sell

    Spa-Style Bath Tray Projects That Are Easy to Sell

    Spa-Style Bath Tray Projects That Are Easy to Sell

    Indulge in a relaxing soak while enjoying your favorite beverage, book, or even a face mask â€" all without leaving the comfort of your tub. Bath trays are a popular and practical item that many people find essential for creating a spa-like experience at home. If you're looking for an easy and profitable craft project to sell, bath trays are an excellent option. They're relatively simple to make, require readily available materials, and cater to a wide audience who value self-care and relaxation.

    The best part? You can customize your bath trays to appeal to different tastes and preferences. Think about the materials, colors, and accessories you use to create unique and appealing designs. Here are some ideas to get you started:

    Bath Tray Essentials

    Before diving into specific design ideas, let's cover the basic components you'll need for a successful bath tray project:

    Materials

    • Wooden board: This forms the base of your tray. Pine, cedar, or bamboo are good choices due to their affordability and natural resistance to moisture. Consider using a waterproof sealant to further protect the wood.
    • Handles: Metal, leather, or wooden handles add a touch of elegance and make the tray easier to carry. Choose handles that match the style of your tray.
    • Legs: Foldable legs are a great addition, allowing the tray to sit comfortably on the edge of the tub. You can find legs made from metal or plastic.
    • Waterproof sealant: To prevent the wood from warping or staining, apply a sealant specifically designed for bathroom use. This helps preserve the tray's lifespan and protects the wood from moisture.
    • Optional accessories: Think about what might enhance the user experience, like a built-in wine glass holder, a book stand, or a soap dish.

    Tools

    • Saw: To cut the wooden board to your desired size.
    • Drill: To create holes for handles and legs.
    • Sandpaper: To smooth the edges and create a polished finish.
    • Screwdriver: To secure handles and legs.
    • Staple gun: For attaching fabric or other materials to the tray.

    Creative Bath Tray Designs

    Now, let's get into the fun part - brainstorming unique bath tray designs. Here are some ideas to spark your creativity:

    Rustic Charm

    This design emphasizes natural elements. Use reclaimed wood for a rustic feel, and add distressed metal handles for an industrial touch. Consider using a natural oil or wax finish for a subtle sheen.

    Modern Minimalism

    Keep it clean and sleek with a simple rectangular tray made of smooth, polished wood. Opt for minimalist handles in brushed metal or leather. This design is versatile and complements a variety of bathroom styles.

    Glamorous Glow

    For a luxurious touch, use a high-quality wood like walnut or maple and stain it with a rich, dark finish. Add elegant crystal knobs or handles and consider adding a small LED light to the tray for a spa-like ambience.

    Personalized Touch

    Offer customization options to make your bath trays extra special. Let customers choose the wood type, finish, and even add a personalized engraving or inscription. You can also offer add-on items like engraved soap dishes or custom-designed bath mats.

    Marketing Your Bath Tray Creations

    Now that you have your designs in place, it's time to get your bath trays in front of potential buyers! Here are a few marketing strategies:

    • Online platforms: List your bath trays on Etsy, Amazon Handmade, or your own website. High-quality photos and compelling descriptions are essential.
    • Local craft fairs and markets: Showcase your creations at events where people are looking for handmade gifts and home decor.
    • Social media: Build an online presence and share photos of your bath trays on Instagram, Facebook, or Pinterest. Use relevant hashtags to reach a wider audience.
    • Collaborations: Partner with other local businesses like spas or bath product retailers to cross-promote your products.

    With a little creativity and effort, you can turn your love for crafting into a successful business selling beautiful and functional bath trays. Offer high-quality products, personalize your designs, and market effectively, and you'll be on your way to creating a relaxing and profitable venture.

    Share:

    How to Craft Multi-Functional Floating Shelves for Organizing and Displaying

    How to Craft Multi-Functional Floating Shelves for Organizing and Displaying

    Craft Multi-Functional Floating Shelves for Organizing and Displaying

    Embrace the minimalist charm and maximize your space with multi-functional floating shelves. These versatile fixtures offer a dynamic solution for both storage and display, transforming your walls into captivating focal points. Whether you're tackling clutter in your living room, creating a cozy reading nook, or enhancing your kitchen's aesthetic, floating shelves deliver a seamless blend of functionality and style.

    Unleashing the Versatility of Floating Shelves

    Floating shelves transcend the realm of mere storage solutions. They metamorphose into artistic canvases, showcasing your curated collections, cherished mementos, and prized possessions. Imagine showcasing your prized novel collection, adorning your walls with a tapestry of vibrant artwork, or displaying your succulent garden in a cascade of cascading greenery. Floating shelves effortlessly integrate into any room, bringing a touch of sophistication and personalized flair.

    Crafting Your Floating Shelf Masterpiece

    The journey to creating your own floating shelves begins with a dash of creativity and a touch of woodworking know-how. Let's delve into the essential steps to craft these transformative pieces:

    Gathering Your Supplies

    Before embarking on your DIY adventure, ensure you have all the necessary materials at your disposal. Here's a comprehensive list to get you started:

    • Wood boards of your choice: Consider pine, oak, or walnut for durability and a natural aesthetic.
    • Heavy-duty brackets: Opt for sturdy metal brackets designed specifically for floating shelves.
    • Wood screws and a drill: Choose screws appropriate for the wood thickness and bracket material.
    • Sandpaper: Prepare for a smooth finish by employing various grits of sandpaper.
    • Wood stain or paint: Personalize your shelves with your preferred color or finish.
    • Level: Ensure your shelves are perfectly aligned and visually appealing.
    • Measuring tape: Precision is key for accurate measurements and a harmonious installation.

    Crafting the Shelves

    Now that your materials are ready, let's bring your floating shelves to life:

    1. Measure and cut the wood boards to your desired dimensions. Ensure your measurements are accurate for a seamless installation.
    2. Sand the edges and surfaces of the wood to create a smooth finish. This step enhances the visual appeal and ensures a pleasant feel.
    3. Apply wood stain or paint to your shelves, allowing them to dry completely. Embrace your artistic side and select colors and finishes that complement your room's decor.

    Installing Your Floating Shelves

    With your shelves beautifully prepared, let's secure them to the wall:

    1. Locate the studs in your wall using a stud finder. Attaching the brackets to studs provides superior stability and weight-bearing capacity.
    2. Mark the locations for the brackets on the wall, ensuring they are level and aligned with each other. This step guarantees a visually pleasing and structurally sound installation.
    3. Drill pilot holes for the screws at the marked locations. Pre-drilling pilot holes prevents wood splitting and facilitates a smooth installation.
    4. Secure the brackets to the wall using the provided screws. Tighten the screws firmly for a secure and unwavering hold.
    5. Slide the shelves onto the brackets, ensuring they are securely seated and balanced.

    Decorating Your Floating Shelves

    The final stage is where your creativity truly shines. Decorate your shelves with a curated collection of items that reflect your personality and style. Here are some inspiring ideas:

    • Organize your books in an aesthetically pleasing arrangement, highlighting their colorful spines or covers.
    • Display framed photographs, artwork, or botanical prints, adding a personal touch and a visual focal point.
    • Create a miniature herb garden with potted succulents or small plants, adding a touch of greenery and freshness to your space.
    • Showcase your prized collectibles, such as vintage cameras, antique figurines, or handcrafted ceramics, transforming your shelves into a curated display of your passions.
    • Embrace the trend of layering by stacking books, placing small decorative objects on top, and incorporating small potted plants for a dynamic and visually appealing presentation.

    Floating shelves are more than just functional fixtures; they are artistic expressions of your personal style and taste. With a little creativity and attention to detail, you can transform your walls into breathtaking galleries, showcasing your treasures while keeping your belongings organized and readily accessible. So unleash your inner designer, gather your supplies, and let your imagination run wild as you craft your own stunning floating shelves.

    Share:

    Personalized Christmas Wood Ornaments to Make

    Personalized Christmas Wood Ornaments to Make

    Personalized Christmas Wood Ornaments: Handmade Gifts That Warm the Heart

    There's something extra special about handmade gifts, especially around the holidays. And when you're talking about Christmas ornaments, personalized wood ornaments take the cake. They're unique, sentimental, and can be crafted to reflect the personality of the recipient. This year, why not ditch the generic store-bought ornaments and create something truly meaningful for your loved ones?

    The Charm of Personalized Wood Ornaments

    Wood ornaments have a timeless charm that evokes warmth and nostalgia. They're a blank canvas for your creativity, allowing you to personalize them with names, dates, inside jokes, or even miniature versions of favorite hobbies or memories. This makes them an extra thoughtful and treasured gift.

    Sentimental Value

    A personalized ornament can be a tangible reminder of a special occasion, like a wedding anniversary, a baby's first Christmas, or even a shared inside joke. It becomes a treasured keepsake that brings a smile to their face every year when they hang it on their tree.

    Unique and Meaningful

    In a world filled with mass-produced goods, a handmade gift stands out. It shows that you put thought and effort into creating something unique and special for the recipient. They'll appreciate the extra time and care you took to personalize the gift, making it truly one-of-a-kind.

    Durability and Longevity

    Unlike fragile glass ornaments, wood ornaments are sturdy and can withstand the test of time. They're also environmentally friendly, making them a sustainable choice for holiday decor.

    Ideas for Personalized Wood Ornaments

    The possibilities for personalized wood ornaments are endless. Here are a few ideas to get you started:

    Family Ornaments

  • Family Names: Carve or paint the last names of your loved ones onto a rustic wooden ornament.
  • Family Portraits: If you're feeling adventurous, use a wood burning tool to create silhouette portraits of your family on the ornament.
  • First Christmas Ornament: Celebrate a baby's first Christmas with a personalized ornament that features their name, birthdate, and a cute little reindeer or Santa Claus design.
  • Couple's Ornaments

  • Wedding Date: Engrave your wedding date on a heart-shaped ornament or a small plaque attached to a wooden tree.
  • Initial Ornaments: Create matching ornaments with your initials intertwined or simply etched on the front.
  • Hobby Ornaments: If you and your partner share a favorite hobby, such as hiking, gardening, or cooking, create ornaments that represent your shared passion.
  • Pet Ornaments

  • Pet Portraits: Paint a simple portrait of your furry friend or create a fun silhouette of their favorite pose.
  • Paw Prints: Create a paw print ornament by pressing your pet's paw onto a piece of wood and then staining or painting it.
  • Pet Names: Write your pet's name on a wooden ornament with a cute dog or cat design.
  • Hobby and Interest Ornaments

  • Music Lover: Create a musical note ornament or a tiny guitar shape for your music-loving friend.
  • Bookworm: Paint a stack of books or an open book with a favorite quote on a wood ornament.
  • Travel Enthusiast: Design a small airplane, a compass, or a globe on a wood ornament.
  • Sports Fan: Create an ornament with your friend's favorite team's logo or a silhouette of their favorite athlete.
  • Materials and Tools

    You don't need a lot of fancy equipment or expensive materials to make beautiful personalized wood ornaments. Here are some basic supplies you'll likely need:

    Wood Ornaments

  • Wooden shapes: Look for pre-cut wooden ornaments at craft stores, online retailers, or even at your local hardware store.
  • Wooden slices: These natural-looking slices of wood can be easily drilled and hung as ornaments.
  • Wooden plaques: You can use these as a base for creating ornaments with multiple layers, or you can attach them to a pre-cut wooden shape.
  • Tools

  • Wood burning tool: This is great for creating detailed designs and lettering.
  • Sandpaper: Use different grit sandpaper to smooth out the wood and prepare it for painting or staining.
  • Paintbrushes: Choose brushes in different sizes for painting, depending on your design.
  • Scissors: Use scissors to cut out stencils or decorative paper elements.
  • Drill: Use a drill with a small bit to make a hole at the top of the ornament for hanging.
  • Pencil: Use a pencil for sketching your design before applying paint or burning the wood.
  • Measuring tape: This is helpful for ensuring your design is centered and properly scaled.
  • Ruler: Useful for drawing straight lines and precise measurements.
  • Paints and Finishes

  • Acrylic paints: These are easy to use and come in a wide variety of colors.
  • Wood stain: Choose a stain that complements the color of your wood ornament.
  • Clear sealant: Apply a sealant to protect your finished ornament from scratches and wear.
  • Glitter: Add some sparkle to your ornaments with glitter glue or fine glitter.
  • Fabric scraps: Use small fabric scraps to create accents or embellishments for your ornaments.
  • Tips for Creating Personalized Wood Ornaments

    Here are some tips to help you create beautiful and unique personalized wood ornaments:

    Plan Your Design

    Before you start, sketch out your design on paper. This will help you visualize how the ornament will look and ensure that you have all the necessary supplies.

    Practice on Scrap Wood

    If you're new to wood burning or painting, practice on a scrap piece of wood first. This will help you get a feel for the tools and techniques before working on your actual ornament.

    Use Stencils

    If you're not confident in your drawing skills, use stencils to create lettering or simple designs. You can find pre-made stencils at craft stores or create your own using cardstock or freezer paper.

    Add Layers

    To create a multi-dimensional look, add layers of paint, stencils, or even fabric scraps to your ornament.

    Finish with a Clear Sealant

    Once your ornament is painted or stained, apply a clear sealant to protect the finish and make it more durable.

    Enjoy the Process and the Gift

    Creating personalized wood ornaments is a fun and rewarding activity. It's a chance to express your creativity and create a truly meaningful gift that your loved ones will cherish for years to come. So grab your tools, gather your supplies, and start making some special ornaments that will bring joy and warmth to your holidays.

    Share:

    Postingan Populer

    Search This Blog

    Powered by Blogger.

    Blog Archive

    Recent Posts

    Pages

    Theme Support